In addition to Gallery pages which can be used to showcase your work, sometimes it's also necessary to create additional pages which contain your own Custom Content. For example, exhibition details, news & events, etc. These types of pages are called Custom Content Pages.
So, How Do I Create 'em ?
Creating a Custom Content Page is easy! Just follow these simple steps:
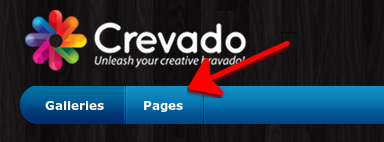
From Crevado Admin, click Pages at the top left of the screen:
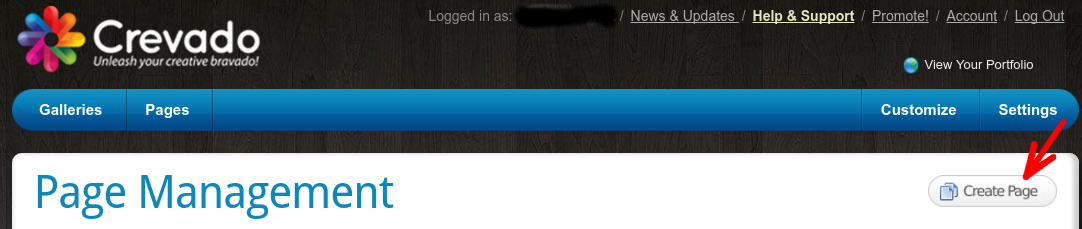
From the Pages section click the Create Page button and the Create New Page pop-up will open:
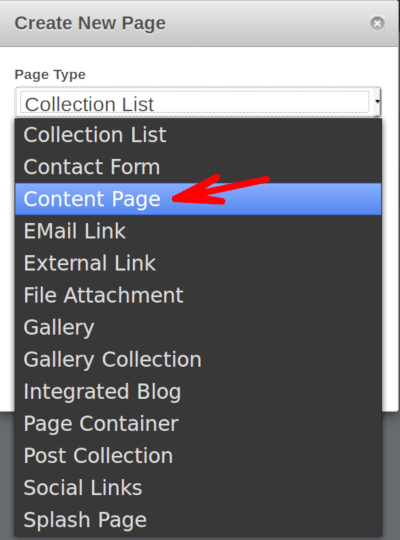
Now you need to change the Page Type to Content Page using the arrow to reveal the drop down menu of options:
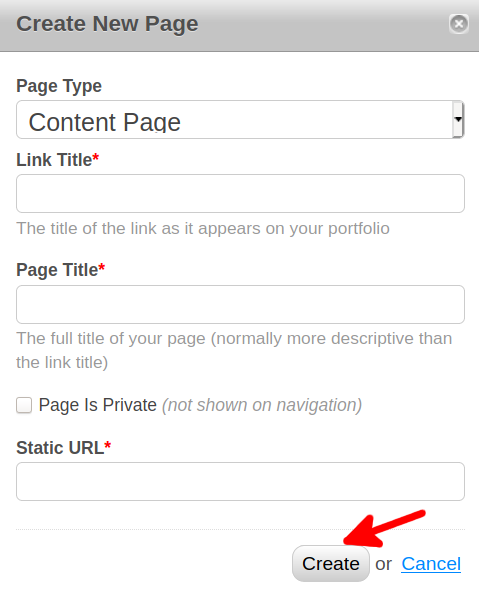
Then fill in the Link Title, Page Title and the Static URL and click on the Create button:
PRO TIP: The Link Title is used when linking to your Page within the navigation of your Portfolio. The Page Title can differ from the Link Title and is used primarily for the purposes of SEO. For more information on SEO and metatags please see customizing SEO and meta tags on your Online Portfolio
After you have created your new page, you will be taken to the Page Content Editor where you can edit the content of your Custom Content Page.
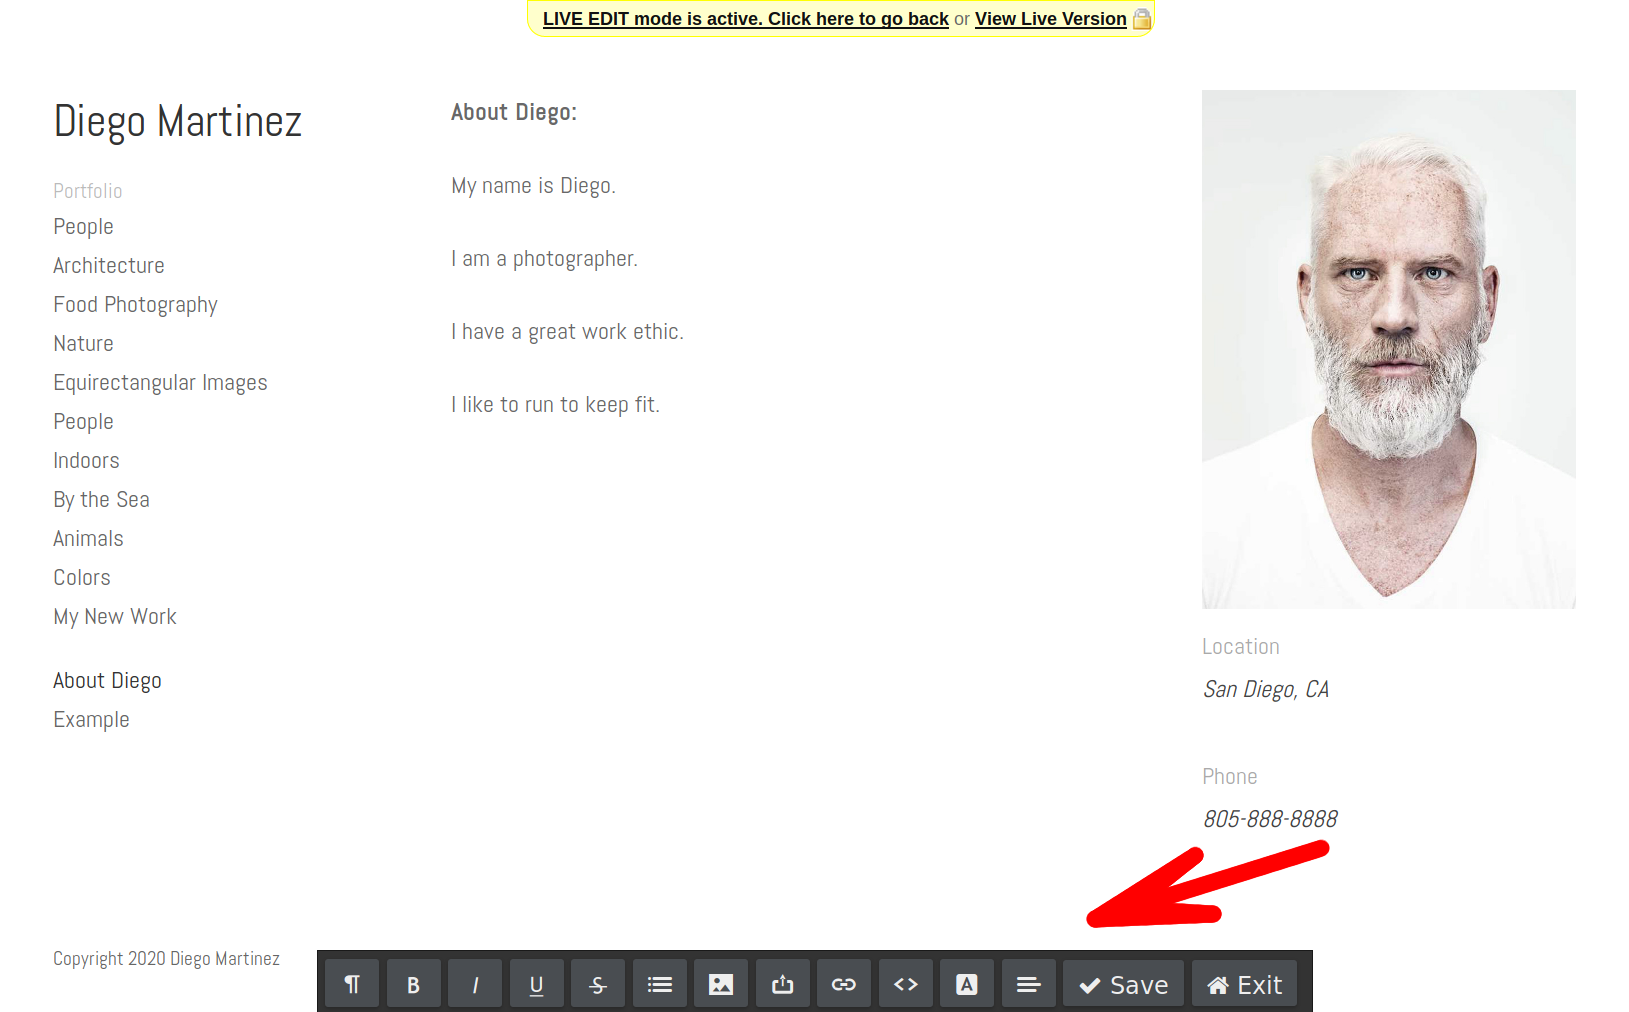
NOTE: The Content Editor toolbar will appear at the bottom of the screen as shown below:
Controlling the Formatting and Layout of the Content on your Page:
The Content Editor Toolbar allows you to control the formatting and styles of the text on your page as well as insert/edit images etc.
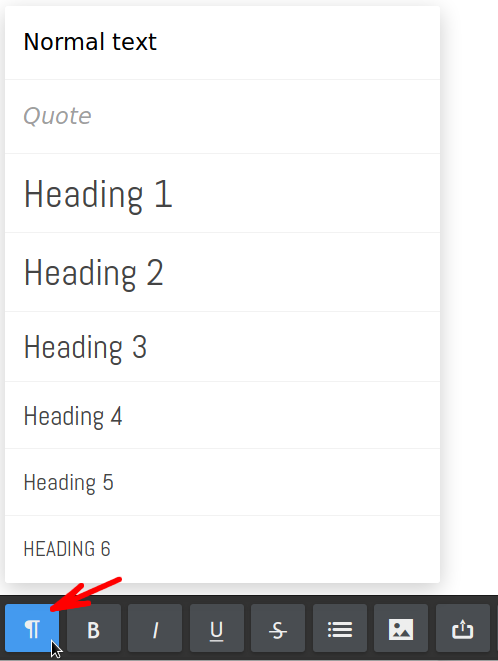
The first button on the toolbar is the formatting button:

The formatting button allows you to control the formatting/styling of text. There are a number of different Formatting Styles that can be applied to the text in your Custom Content Pages. These styles can be customized using the Theme Editor and then applied using the formatting button. Typical styles include the Normal Text of the page and the Heading Sizes 1 to 6 which are ordered by importance i.e. Heading 1 is the primary heading of the page. Here is a screenshot of the list:
How these styles appear i.e. the Font Faces used, the Colors and the Font Sizes are controlled using the Crevado Theme Editor. For more information on how to customize these styles using the Theme Editor please see the following article for more information on customizing styles.
Adding Lists to Content Pages:
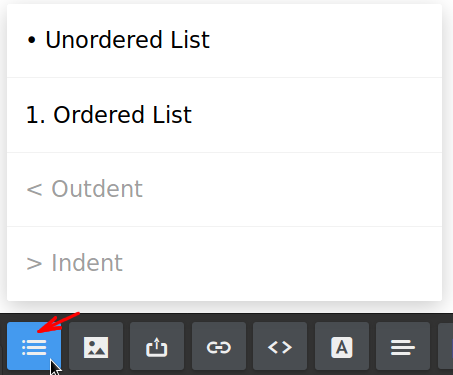
On the Content Editor Toolbar click on the Lists button as shown below:

A pop-up will open with the following list options, click on the type you want to select it:
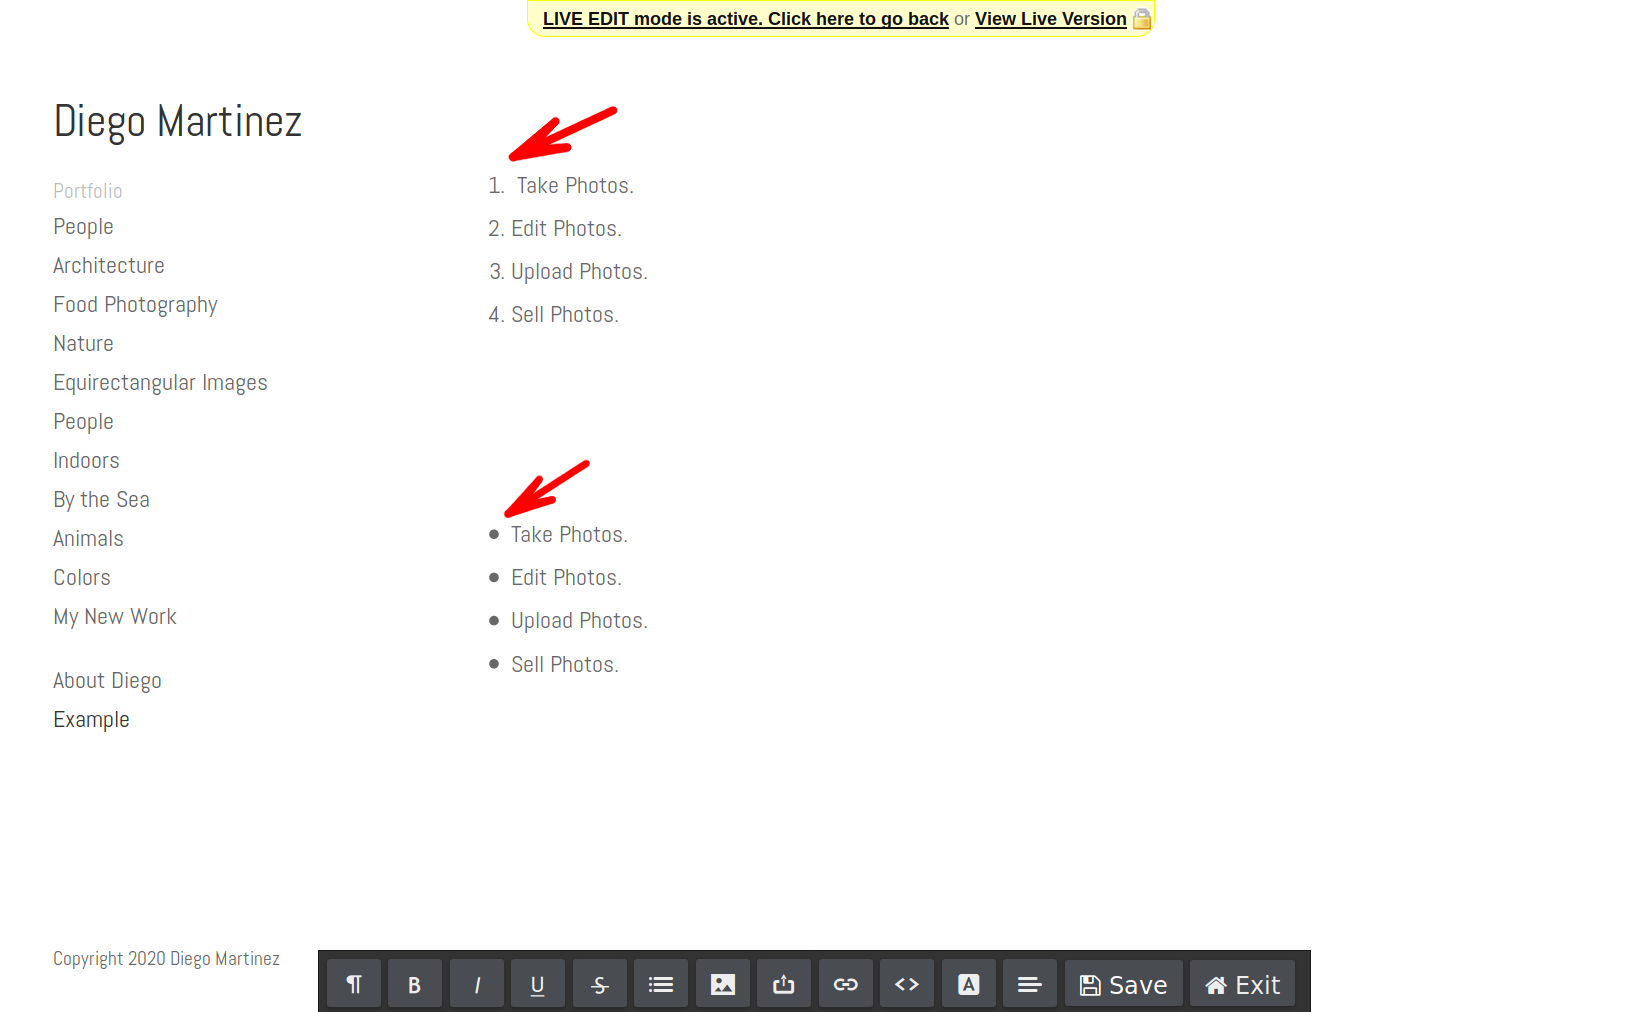
In the example below, the first list is an numerical Ordered List and the second is an Unordered List that uses bullet points:
Inserting Images into Content Pages:
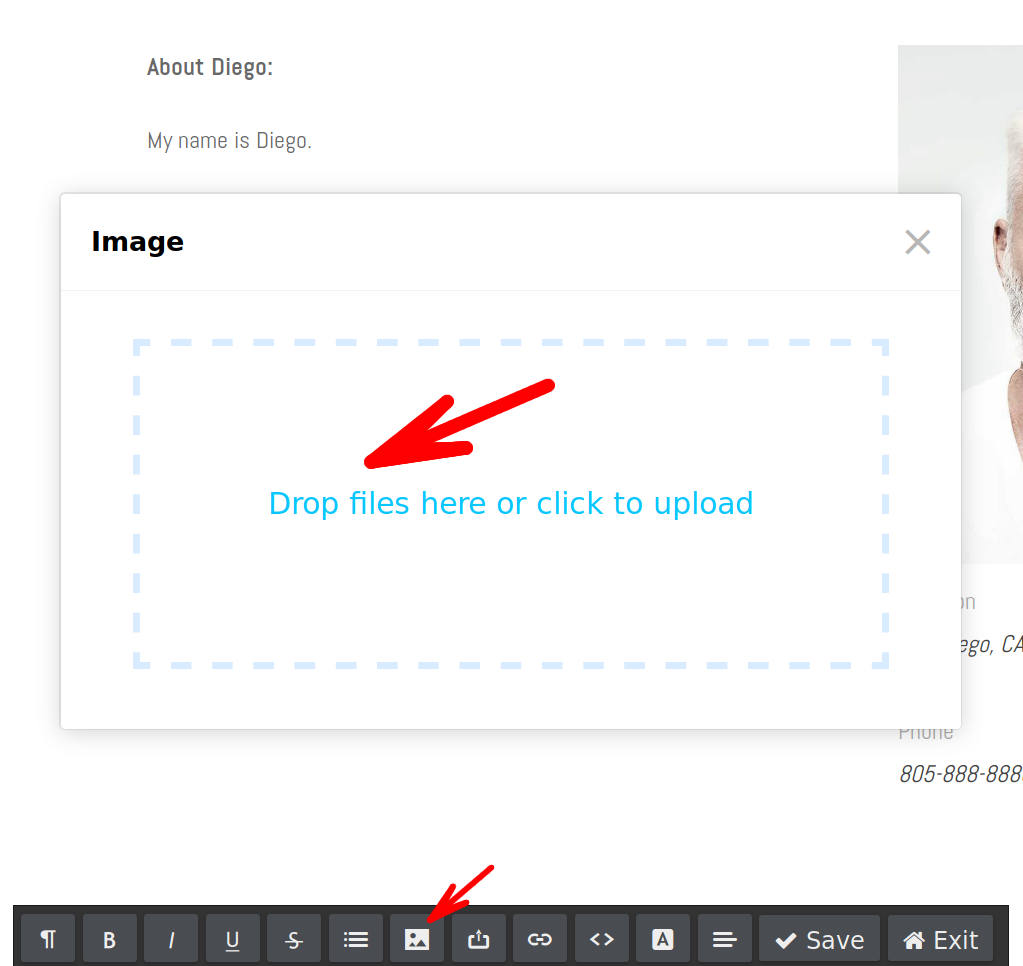
You can insert images into your Content Page using the Insert Image button on the content editor toolbar, as indicated below:

Once you have clicked on the insert image button a pop-up will open into which you can drag and drop the image that you want to insert, or you can click to select an image from your local device:
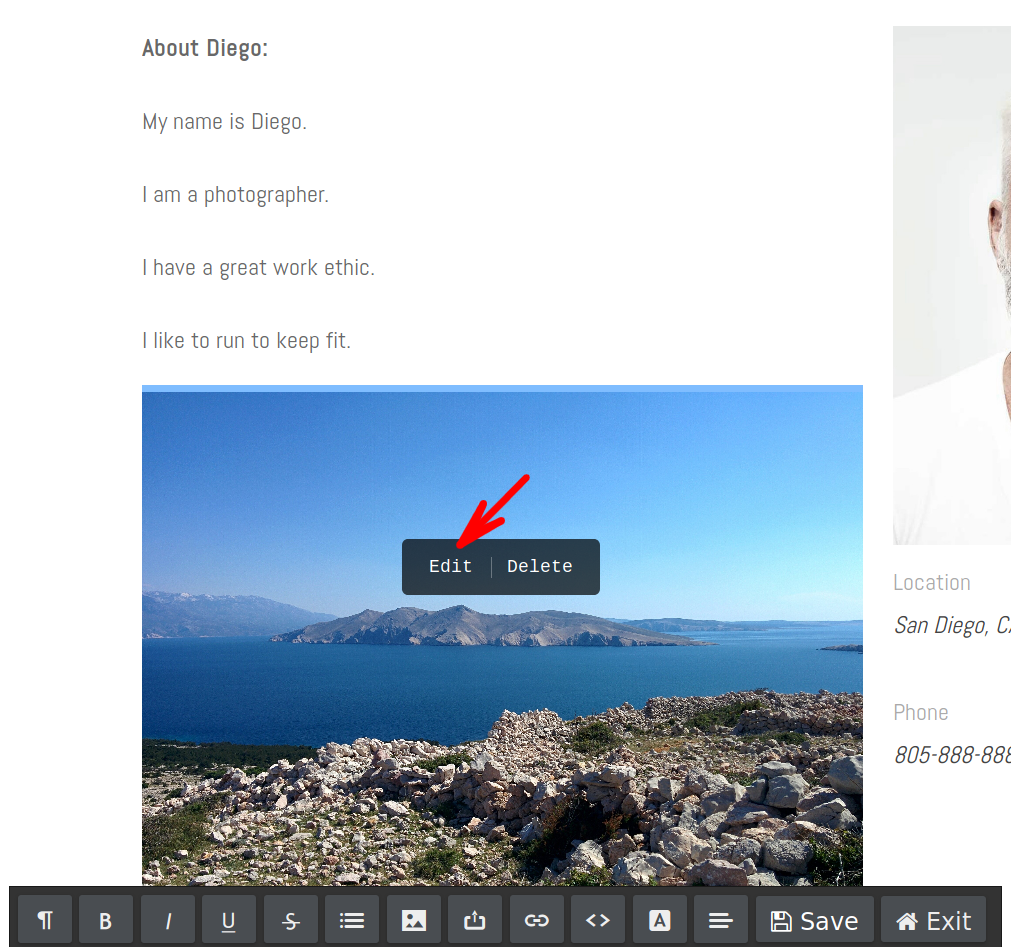
Once the image has been uploaded it will be inserted into the Content Page in the location where your cursor was. You will find additional image options by clicking on the image and choosing the Edit option:
Once you click on Edit, the additional image options available are:
- To give the image an Alt Text/Title - This is the written copy that appears in place of an image on a webpage if the image fails to load on a user's screen. This text helps screen-reading tools describe images to visually impaired readers and allows search engines to better crawl and rank your website.
- Add a Caption to the image.
- Adjust the Position of the image - i.e. none, left, center or right.
- Adjust the Image Sizing.
- Add a Link to the image - Link the image to a URL so when someone clicks on the image, they will be brought to that URL.
Don't forget to click on the Save Your Changes button when you are done!

PRO TIP: Whilst editing page content, you can change an existing image by dragging the replacement image onto it - this will simply swap the image while retaining any existing metadata (i.e. alt text, caption, URL link etc.).
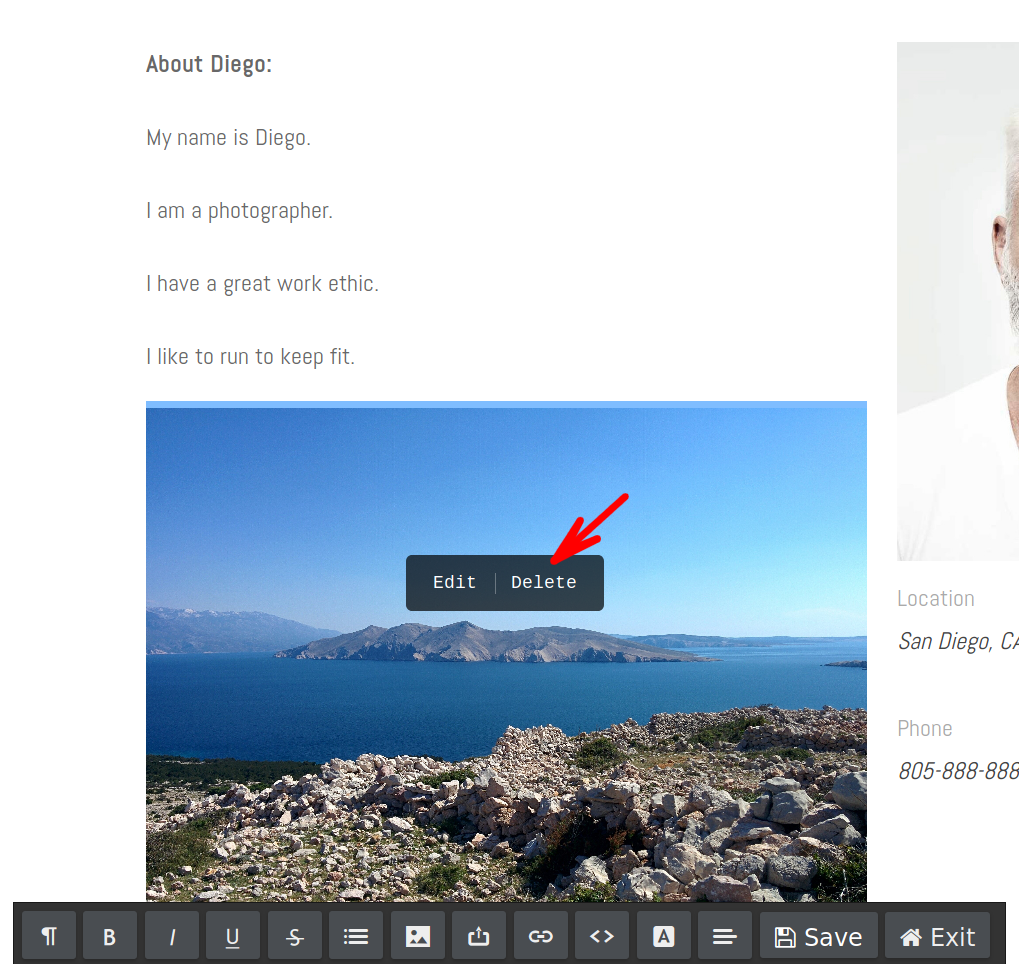
Of course, you can also delete any image that you upload by clicking on the image and then clicking on Delete as shown below:
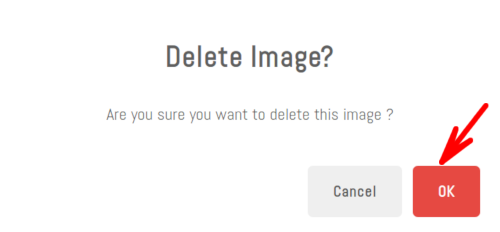
Then click on OK to confirm the deletion:
Attaching PDF & MS Word Documents to a Content Page:
PDFs and MS Word Doc are supported for file attachment within a content page.
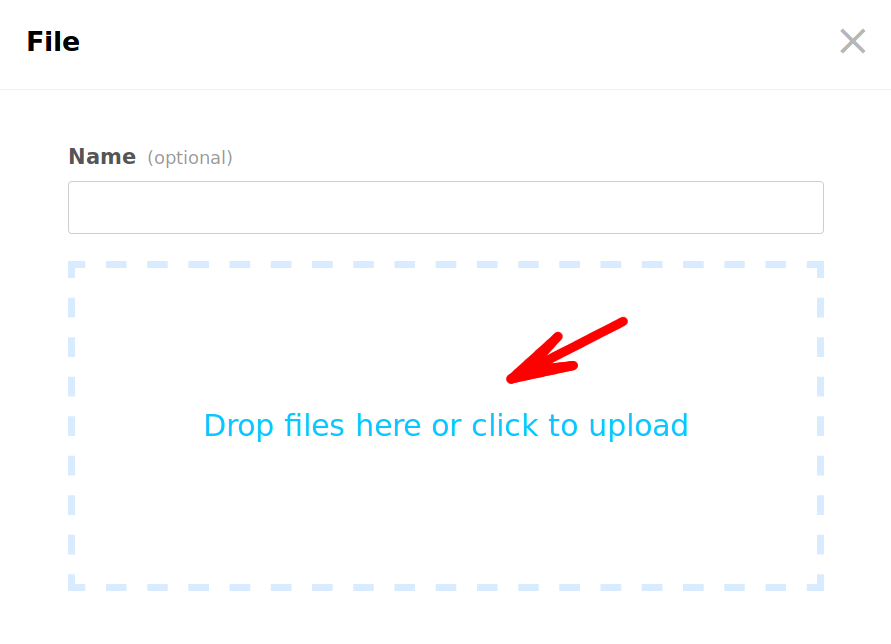
You can attach the PDF or MS Word Document to your page by positioning the cursor where you want it to be on the page and then clicking on the File button on the content editor toolbar:

A pop-up will open where you can name the file attachment (optional) and then either drag and drop the file attachment or click to select it from your local device:
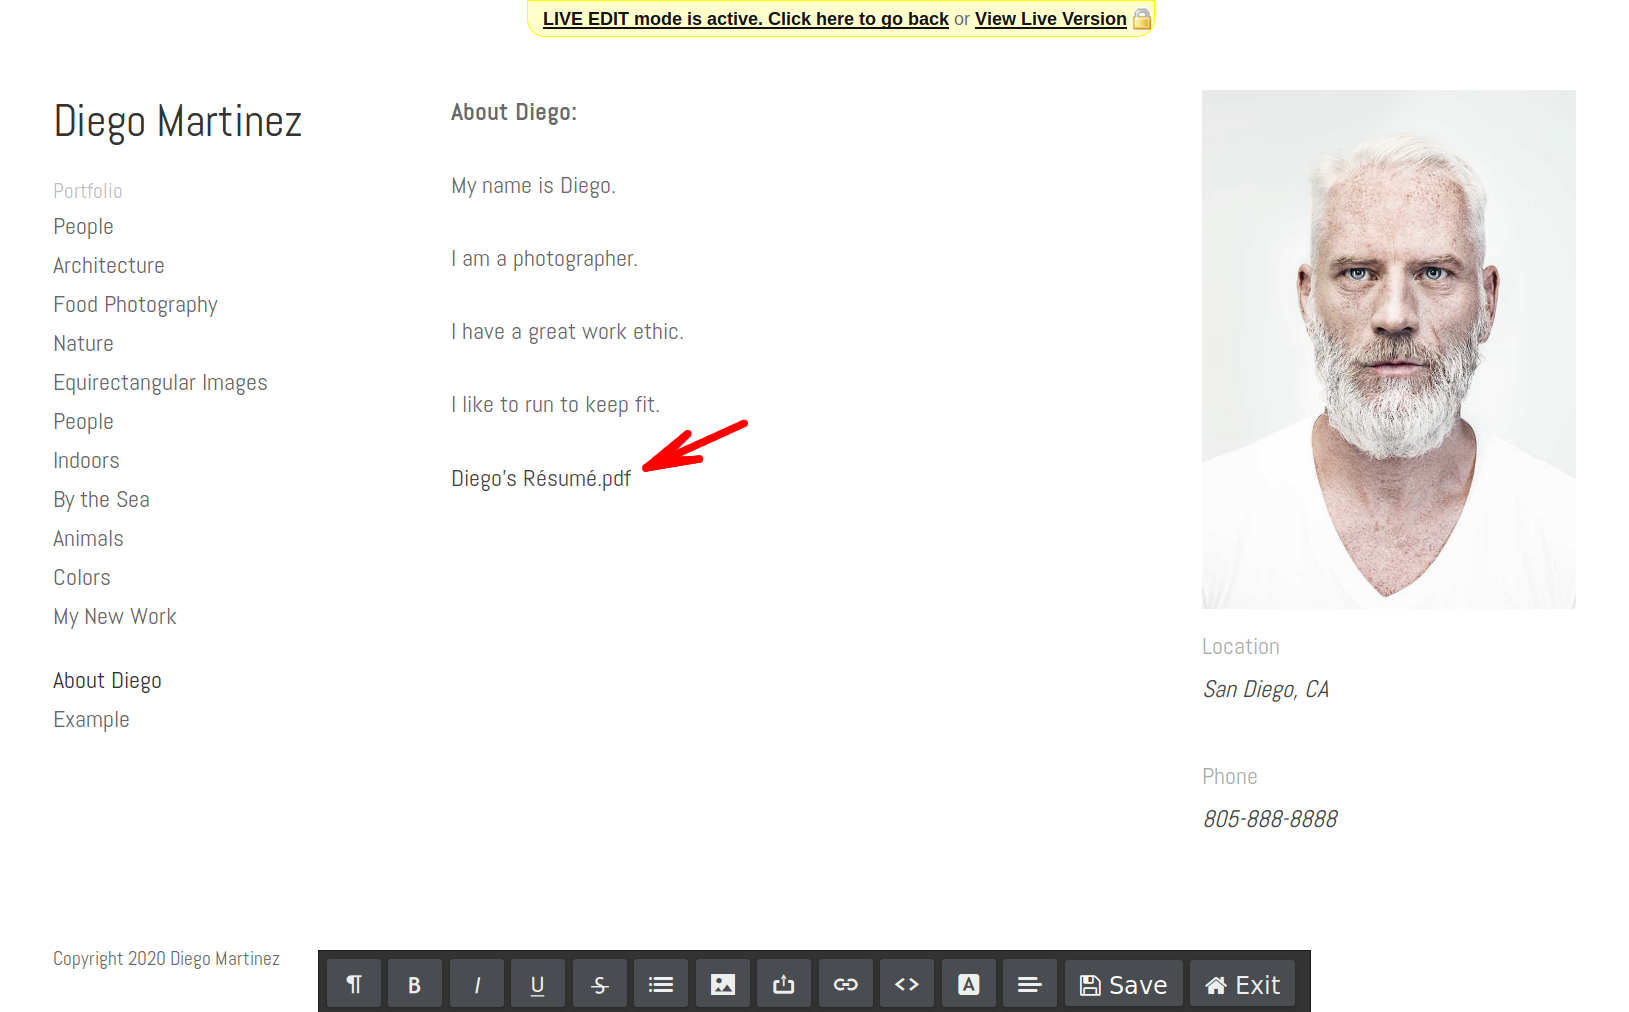
NOTE: If you choose not to name the file attachment here, it's existing name prior to attaching it will be used. For example, if you saved a PDF as "Diego's Résumé" and then attach it to your content page, "Diego's Résumé" will be the text that will appear on your content page for that attachment.
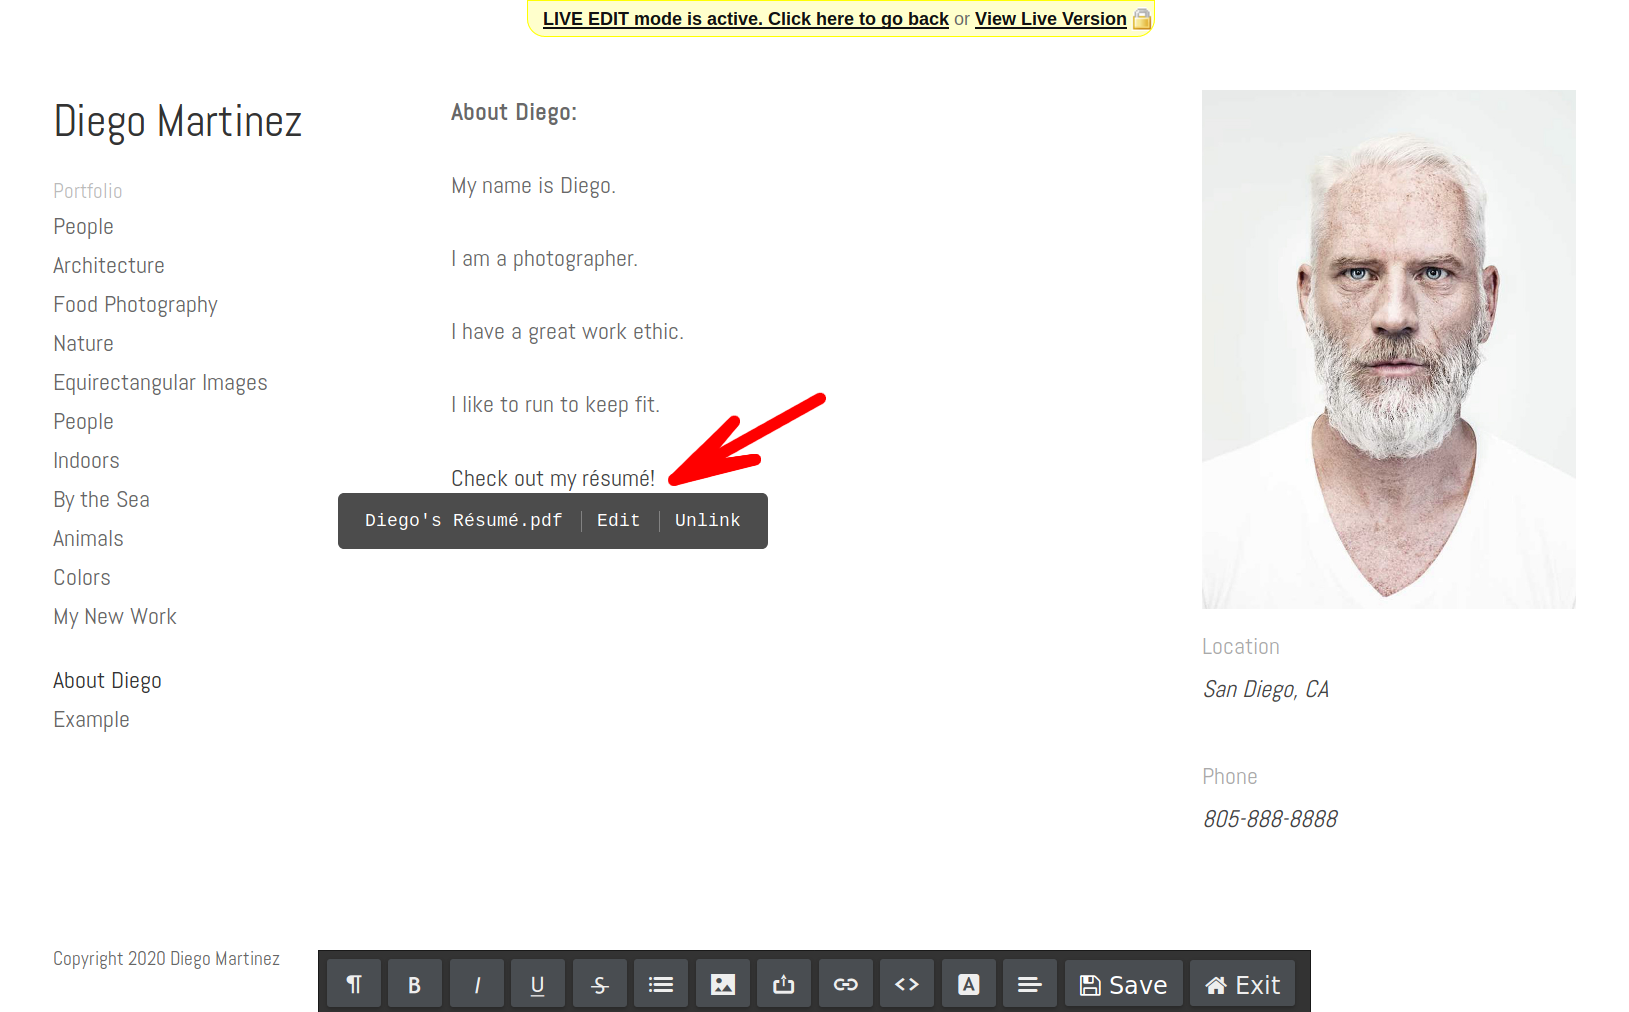
Below you can see that the file we attached entitled "Diego's Résumé" (it's existing name) is now positioned where we had the cursor on the content page:
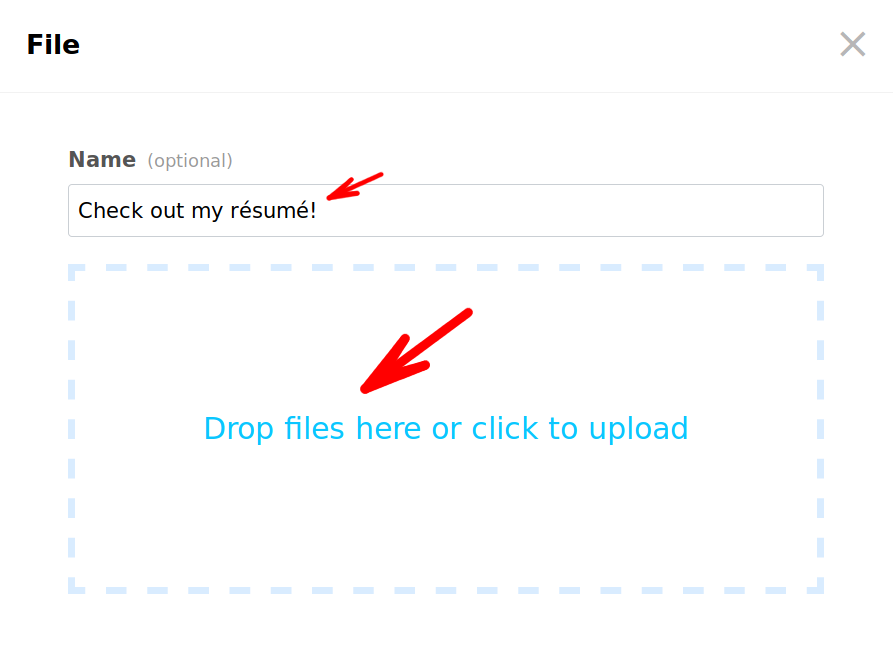
You can also attach a file directly to a piece of text on the page by selecting the text and then clicking on the File button. For example, on your "About" page you could attach your résumé. In the example below we typed the text "Check out my résumé!" and then selected this text. Next we need to click on the File button to open the file attachment pop-up area:

As you can see, the selected text has been automatically entered into the name field of the file attachment pop-up. Now we just need to drag the file attachment in or click to select it from our local device:
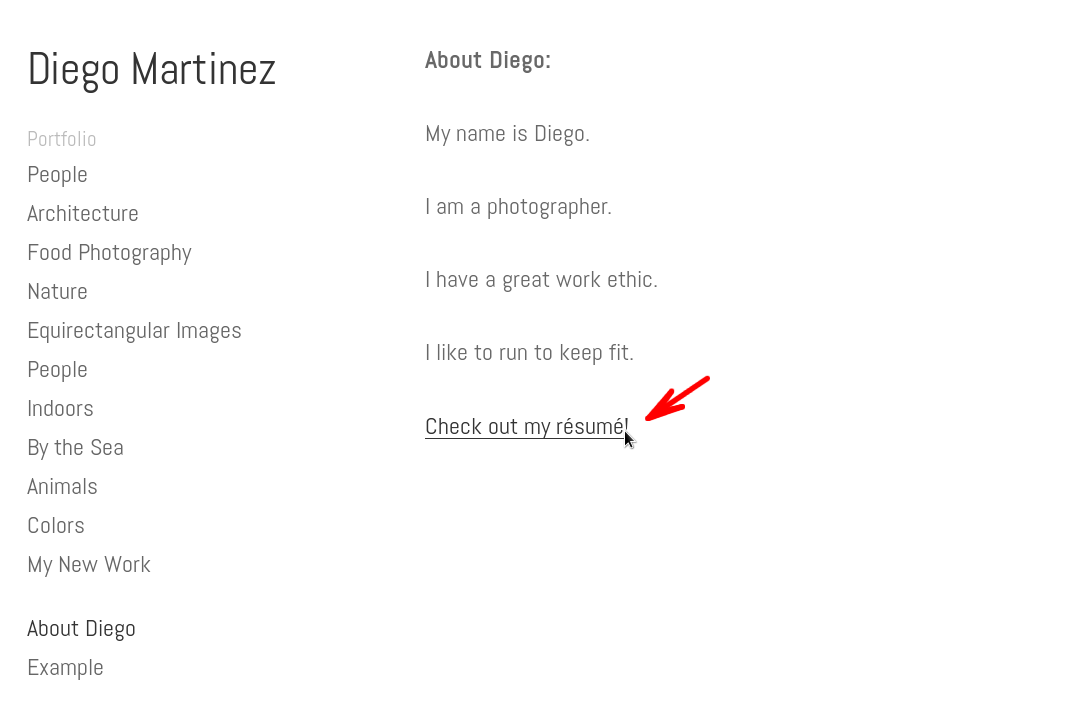
As you can see below, it has been inserted and attached to the "Check out my résumé!" text. Now when someone views this "About" page and clicks on the "Check out my résumé!" text, they will automatically download the attached résumé:
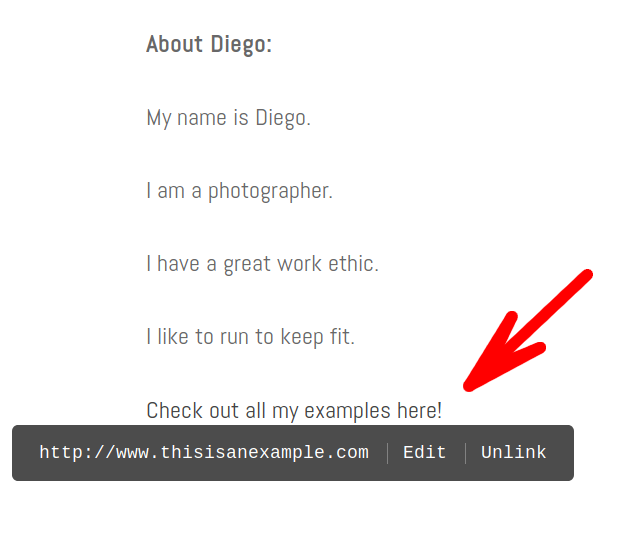
Of course, you can also View an attachment and/or Edit it, and/or Unlink it by click on it within the content page and clicking on the option you want, as shown below:
Attaching a Link Using the Content Editor:
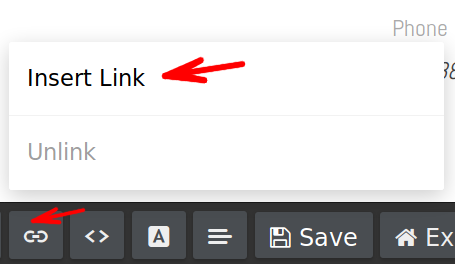
It is easy to insert a link directly into a content page. Firstly, position the cursor where you want to link to be and then click on the Link button on the toolbar as shown below:

Then click on Insert link:
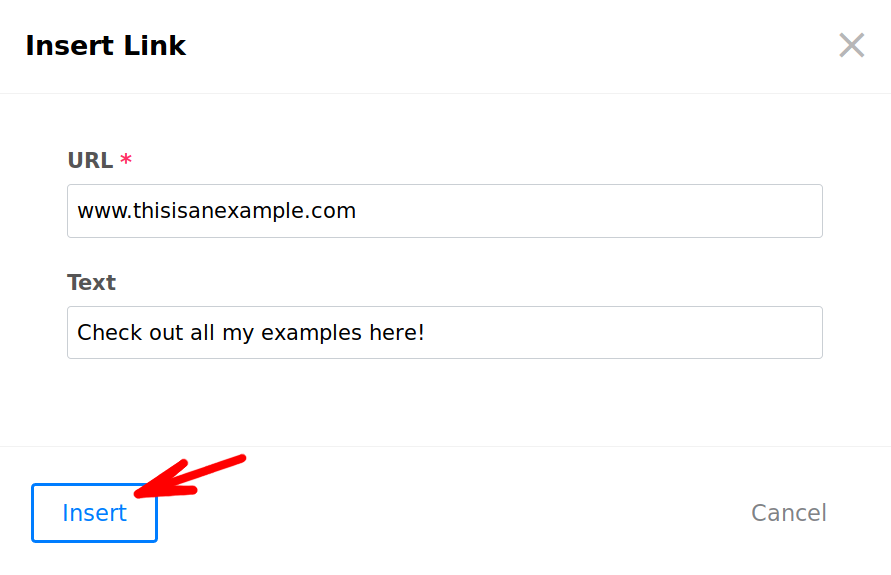
A pop-up will open. Here you simply type the URL that you want to link to and enter some text to describe the link and then click on Insert:
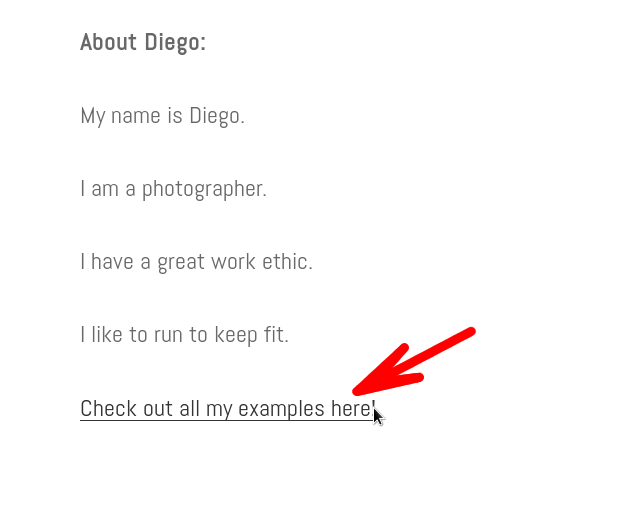
The text you entered will now appear as a clickable link on your content page. When someone clicks on the text, they will be taken to the URL that you provided/linked.
If you want to View, Edit or Unlink the URL, simply click and choose the option you want:
NOTE: You can also use the Link button to insert an Email link into a content page. To do this, click on Insert Link and then in the URL field enter the Email address that you want to link to using the following format: mailto:example@gmail.com and in the Text field enter some text to describe the link e.g. "Email Me". Then click Insert. You will then be taken back to the content editor page. Your e.g. "Email Me" link will now be visible on that page. Don't forget to click Save on the Content Editor toolbar before you exit the Content Editor.
Customizing Font Colors Using the Content Editor:
Note: You can change font colors using the Content Editor but be aware that these font colors will override any theme styles (including colors assigned via the Theme Editor).
Select the text you wish to change the color of and then click on the Font Color button:

A pop-up will open displaying a color chart:

You can change the selected text color by clicking on a new color from the color picker pop-up.
In addition to setting font colors, you can also highlight text. The process is essentially the same, select the text you wish to highlight and click the font color button on the toolbar. This time simply click the highlight tab from the color picker pop-up and click on a new highlight color to apply it.

Here is a sample Portfolio in Live Edit Mode:
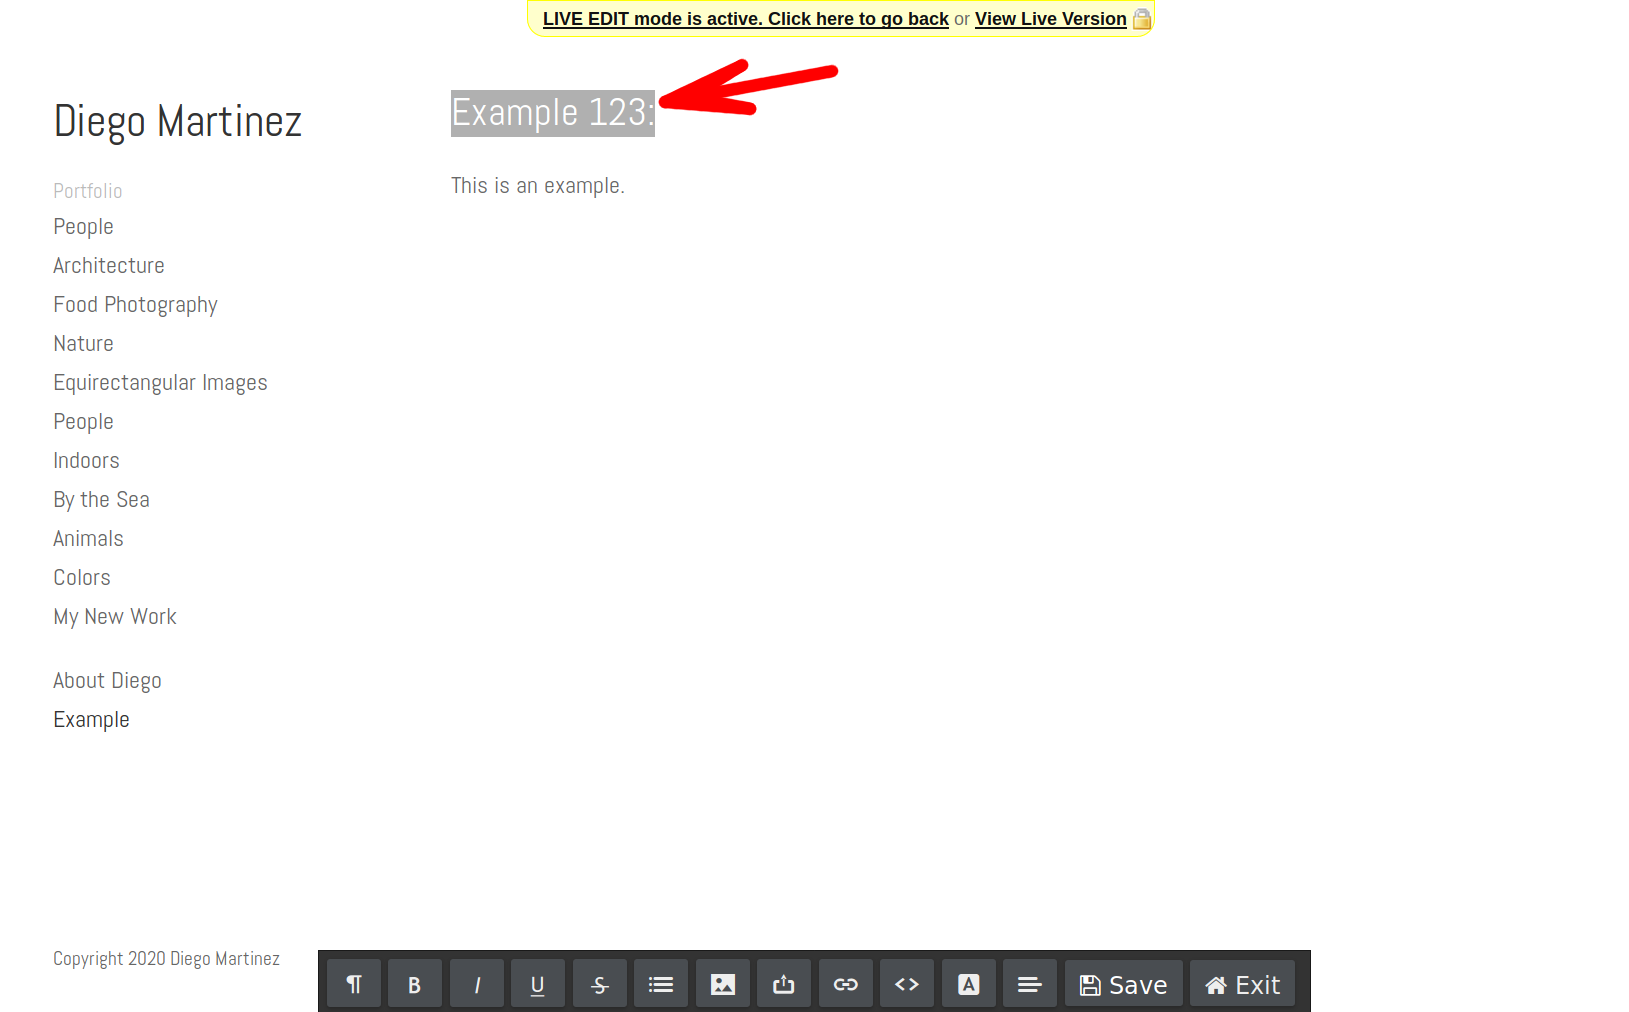
Here you can see that I have selected the text "Example 123:" for highlighting:
Now you can see that I have highlighted it in yellow using the Font Color button on the Content Editor Toolbar, selecting the highlight option and then the color yellow:

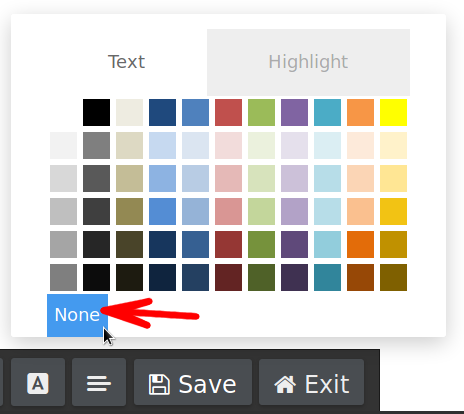
You can remove a highlight by selecting the highlighted text, clicking on the Font Color button on the Content Editor Toolbar, selecting the highlight option and then clicking on none:
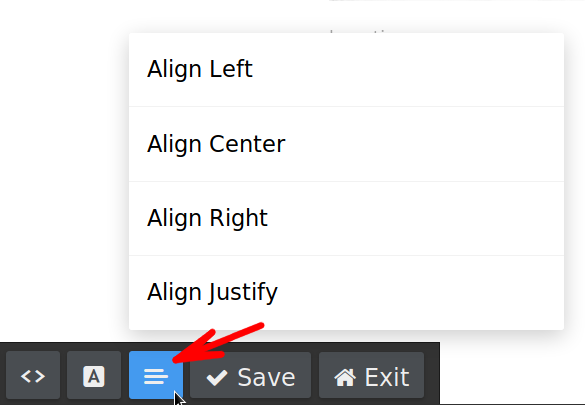
Controlling Text Alignment Using the Crevado Content Editor:
You can use the alignment button on the toolbar to alter the current object in your content page:

When you click on the text alignment button you will be given the options; align left, align center, align right or align justify. Simply click your preferred alignment to change it.
Something not working? no worries - just contact us!