The following article describes how to link your Network Solutions registered domain name with your Crevado Portfolio.
remember: custom domain name binding requires a Premium account for details see the plan comparison page
- Log in to your Network Solutions control panel
- Goto Domains / Manage Domains
- Select your domain by checking the box next to it and click ”Edit DNS”
- Under ”Advanced DNS Manager” click ”Manage DNS Records”
NOTE - You are unable to add your CNAME records with Network Solutions Default A Records in place so you must first scrap your A Records. If something goes horribly wrong, you can reset to default afterwords.
- Edit your A records and Delete the @none, * and WWW records
- Now return to the ”Advanced DNS Manager”
- Under ”Host Aliases” click ”add/edit”
- Important! Under Alias, in an empty box put www | Leave the first drop down blank | Select the second radio button | In the Other Host box enter proxy.crevado.com (Note there is no . at the end like regular CNAMES)
- Now click go
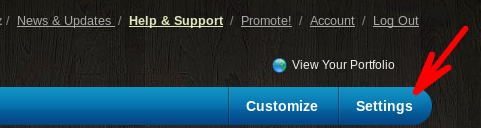
- Now you need to login to the admin of your portfolio. Click on the “Settings” tab:
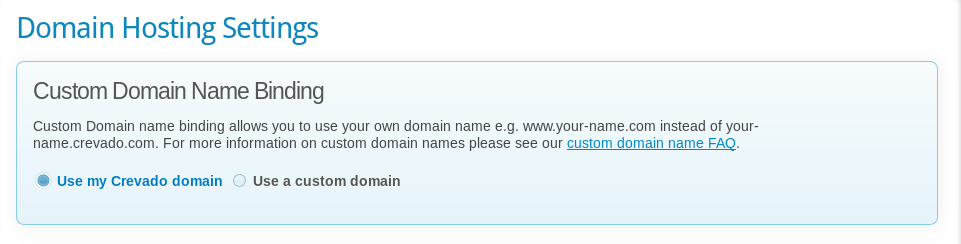
 * Scroll down to “Domain Name Binding” under “Domain Hosting Settings”
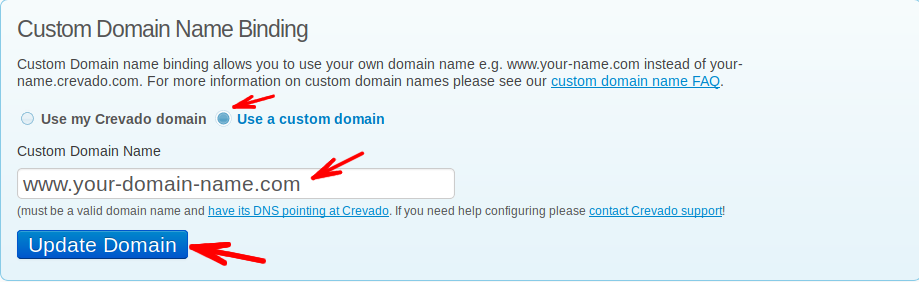
 * Click on “use a custom domain” and add the WWW version of your domain name in the field provided and click the “update domain” button.
That’s it! Now all you need to do is wait for the DNS changes to take effect
- NOTE!: The DNS changes you made at your registrar can take some time to propagate to DNS servers around the internet (anywhere from one hour to one day).
If you run into any trouble, you will find it more helpful to first contact Network Solutions for support as they have access to those settings (while Crevado doesn’t). Here is a direct link to their Support Page.