The following article describes how to link your Google Domains registered domain name with your Crevado Portfolio.
Remember: Custom Domain name binding requires a Premium account for details see the plan comparison page
Set Up Your Forwarding
First you need to create forwarding from your bare/naked domain name to the www subdomain using the following steps:
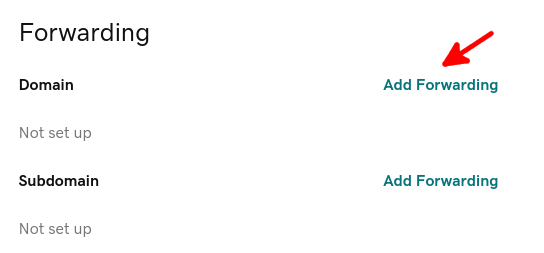
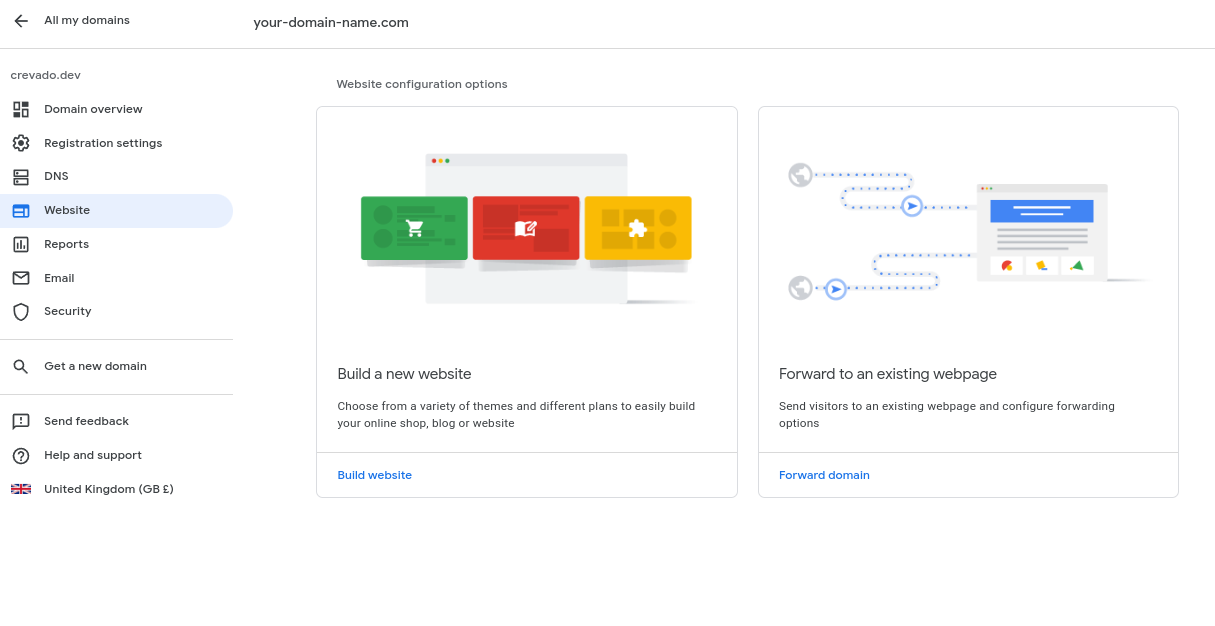
To start, click the website option on the left hand side, then click on forward domain on the right hand side:
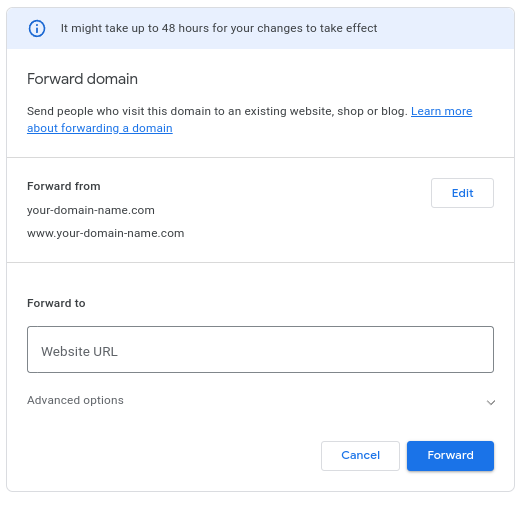
The default Forward From includes both the bare/root domain as well as the www subdomain - we need to change this so it only forwards the root domain. Click the Edit button
to edit the forward from list:
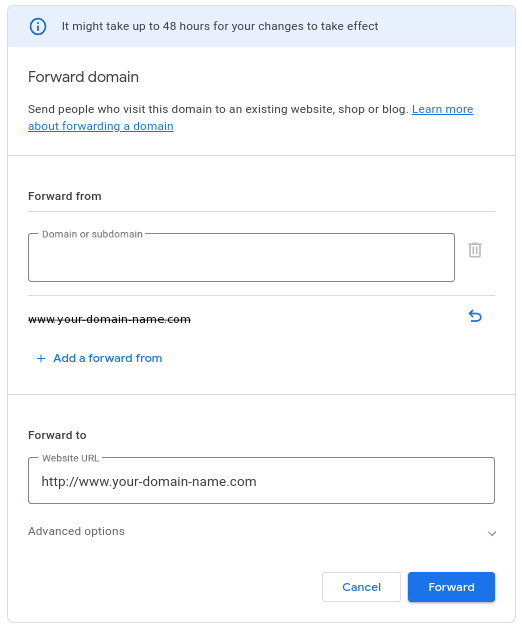
Delete the the 'www' forward from option by clicking the related trash can button:
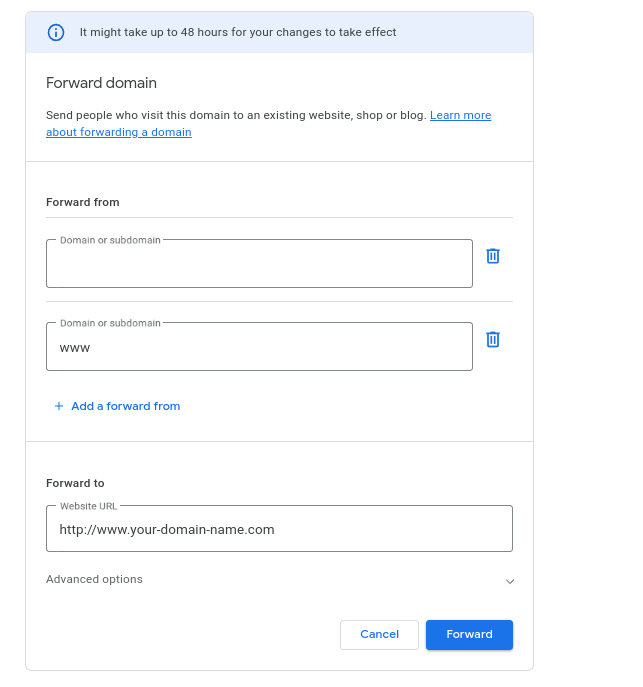
Delete the the 'www' forward from option by clicking the related trash can button, the remaining Forward From subdomain option left should be left blank as
indicated below.
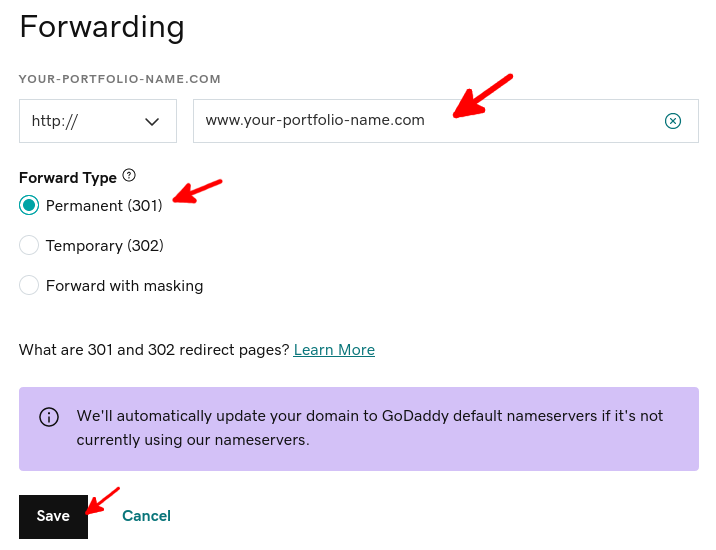
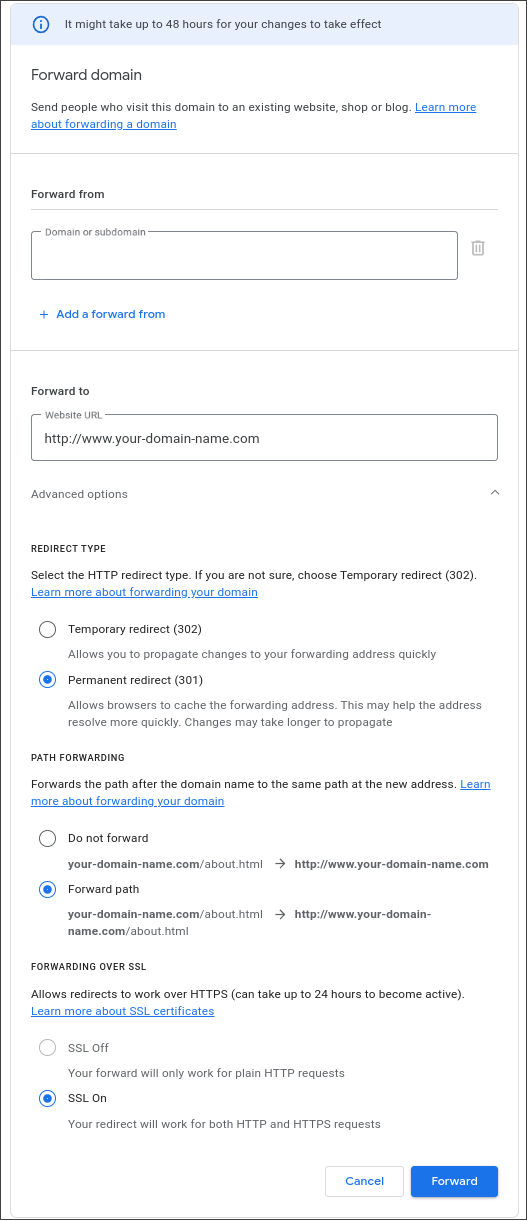
Be sure to enter your target forwarding URL in the format http://www.YOUR-DOMAIN-NAME.COM -- note that 'YOUR-DOMAIN-NAME.COM' should be replaced by your root domain name:
NOTE: Make sure you replace 'your-domain-name.com' with the actual name of your domain name, i.e. if your domain is myportfolio.com then you would enter myportfolio.com
To finalize your forwarding configuration expand the advanced options section by clicking Advanced Options at the bottom of the page.
This will reveal additional options as indicated in the screenshot below, here you need to change two default options:
Under Redirect Type select the Permanent Redirect (301) option. Under Path Forwarding choose the Forward Path option. Ensure your screenshot
looks like the one below remembering to substitute 'your-domain-name.com' with your custom domain name. Click Forward to save the forwarding setup:
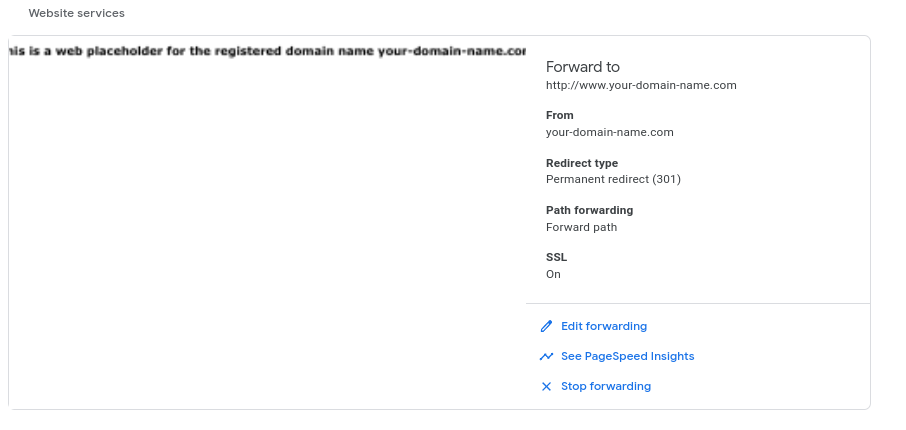
From the forwarding confirmation page, confirm that your forwarding setup looks like the screenshot below.
Set Up Your DNS
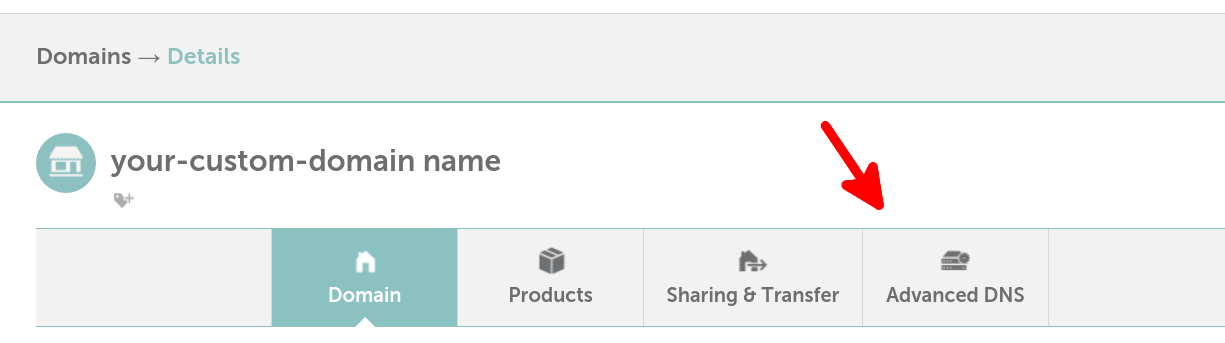
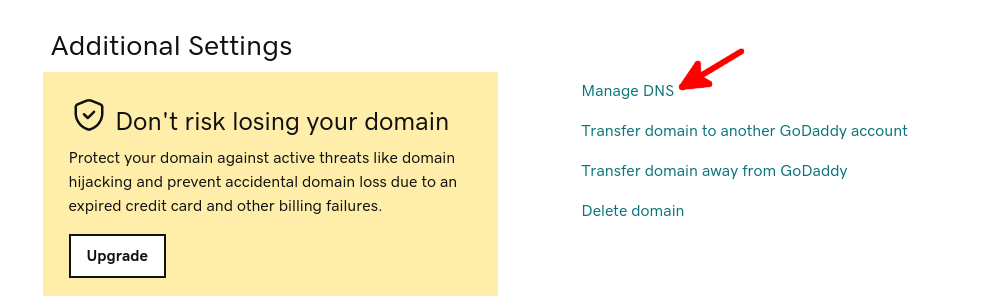
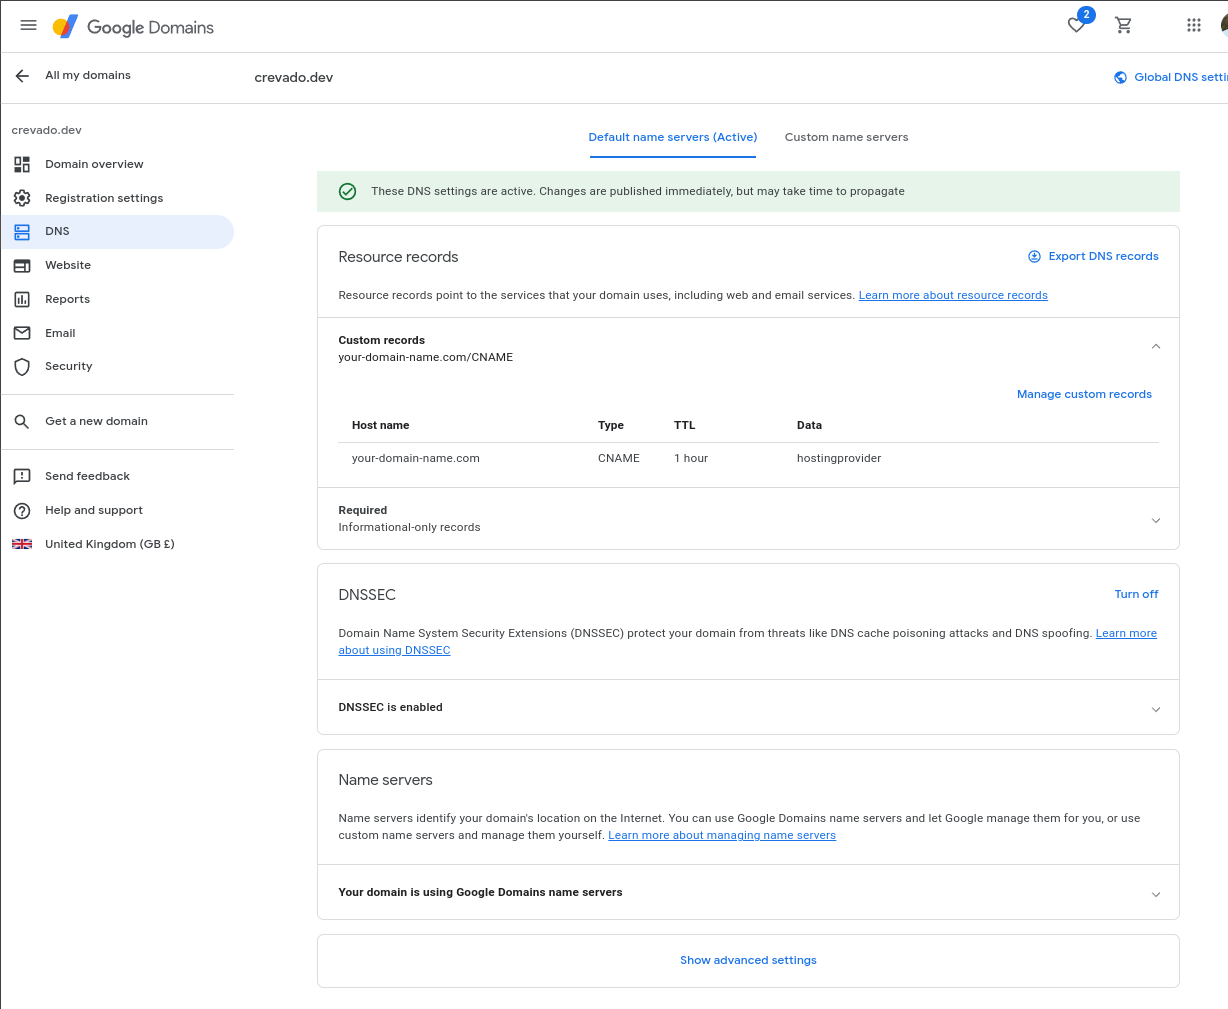
Now we need to setup your DNS, click DNS on the left hand side. You'll be taken to the DNS page where
it lists your DNS records -- click manage custom records:
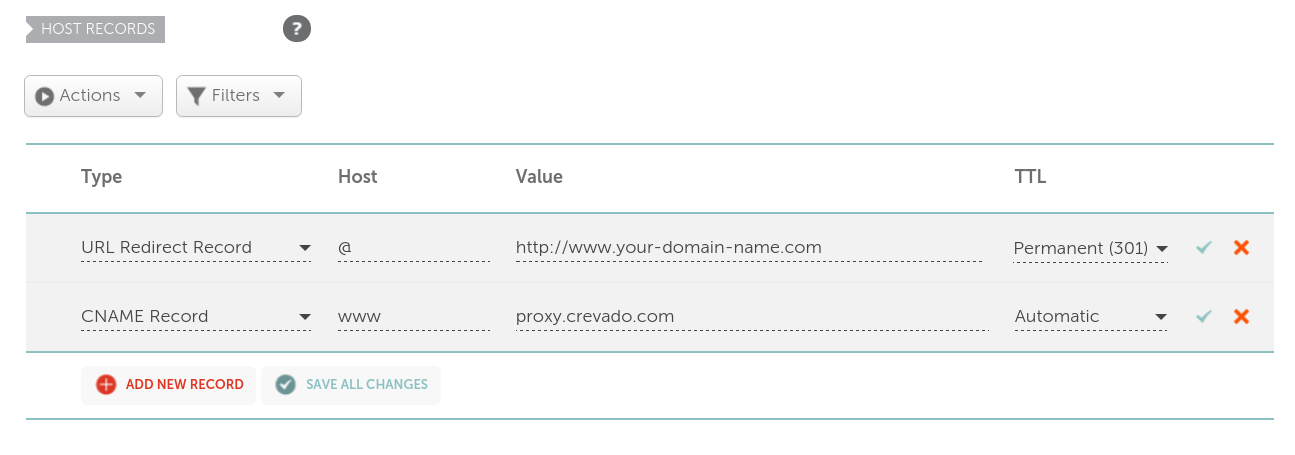
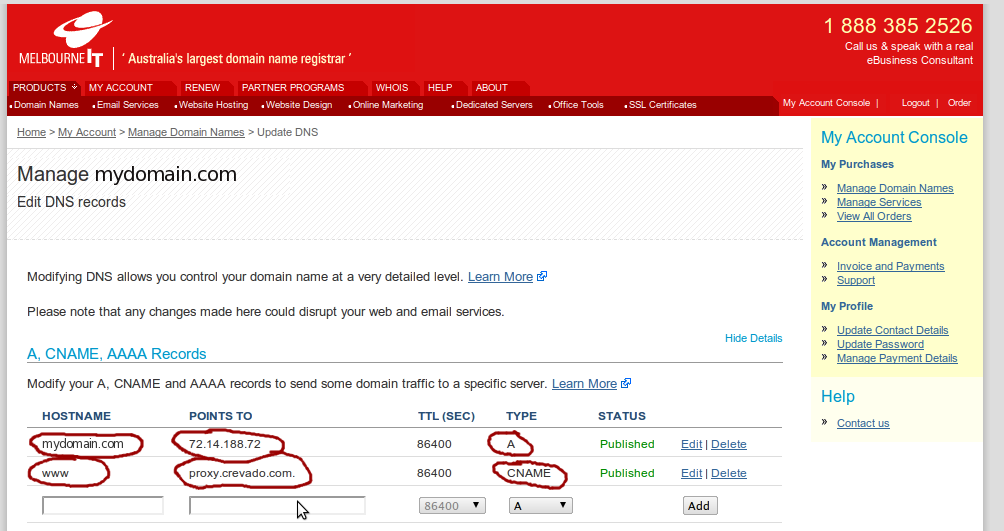
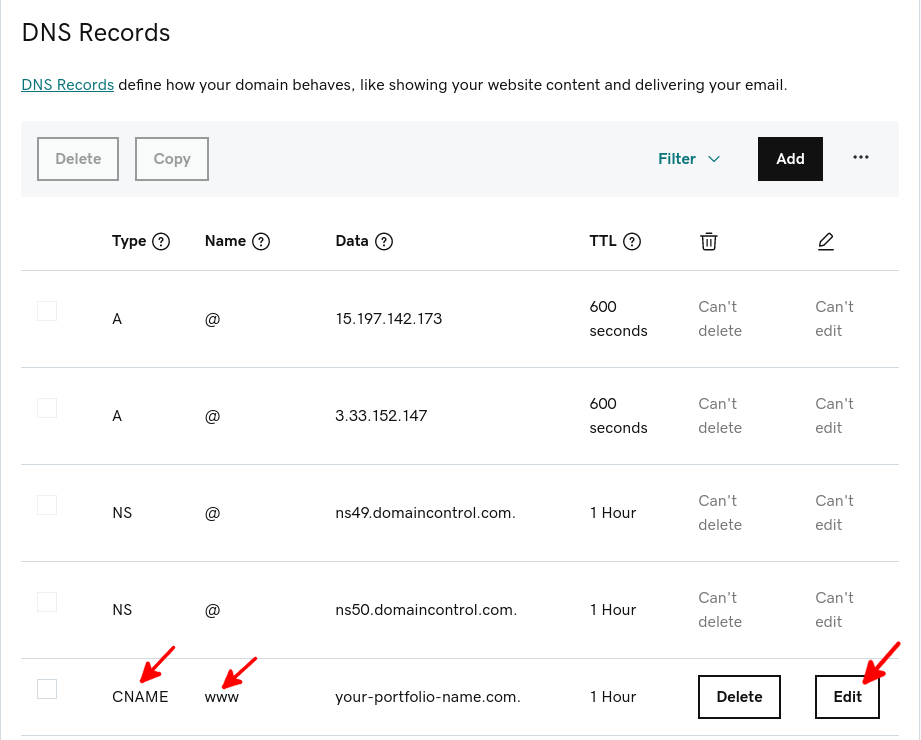
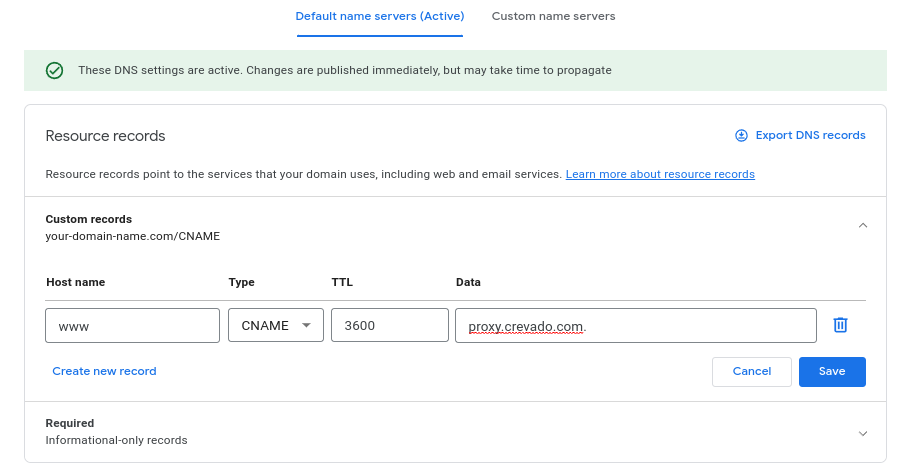
 Your custom records page may show many records, the only one we're interested in changing is the WWW record.
From the custom records page, ensure your WWW record is of type CNAME and points to proxy.crevado.com.
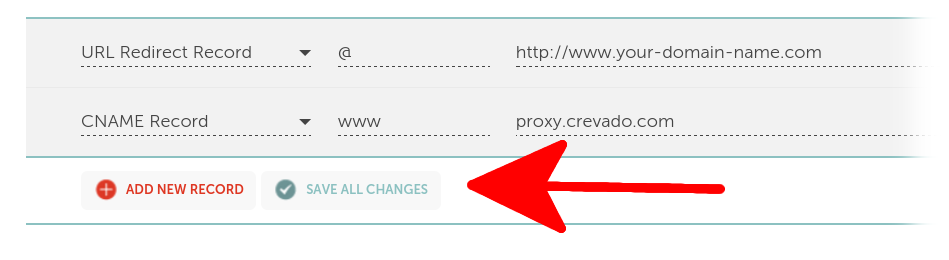
If you do not have a WWW record create one by clicking the create new record button and ensure it is configured as shown below. Click save when you're done:
Your custom records page may show many records, the only one we're interested in changing is the WWW record.
From the custom records page, ensure your WWW record is of type CNAME and points to proxy.crevado.com.
If you do not have a WWW record create one by clicking the create new record button and ensure it is configured as shown below. Click save when you're done:
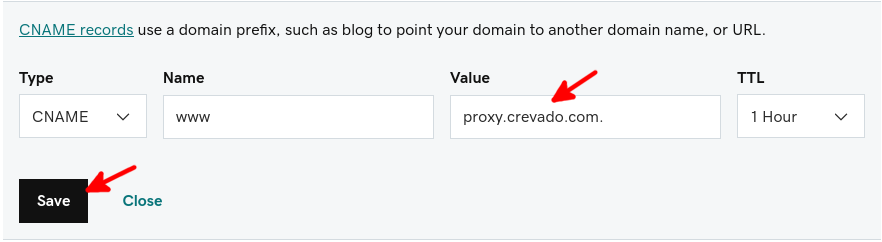
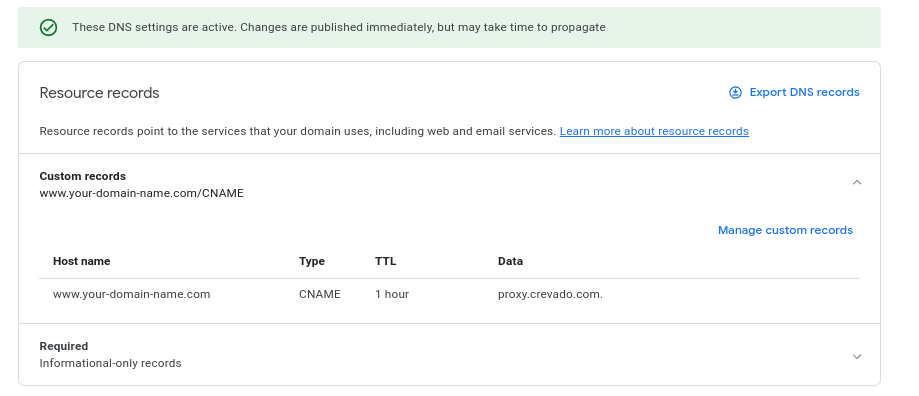
 The resource record confirmation page should now display the overview of your records. Confirm the WWW record shows as type CNAME and is pointing to proxy.crevado.com.:
NOTE: DNS changes like the above can take up to 48 hours to take effect and propagate throughout the internet.
Rejoice! All your domain configuration work is done - the final step is to setup the Crevado side of things.
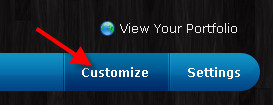
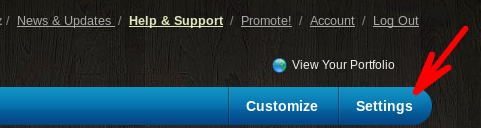
Login to Crevado Admin and click on the “Settings” tab.
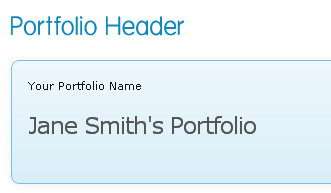
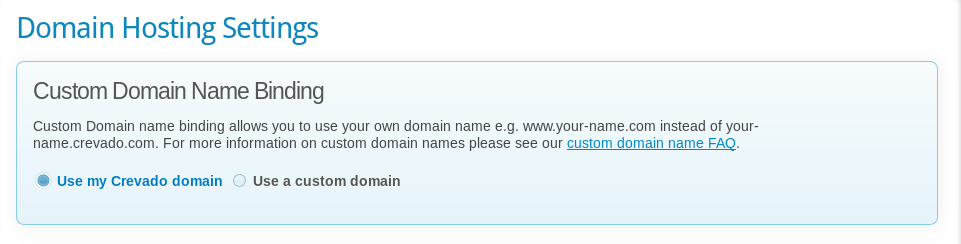
 Scroll down to “Domain Name Binding” under “Domain Hosting Settings”
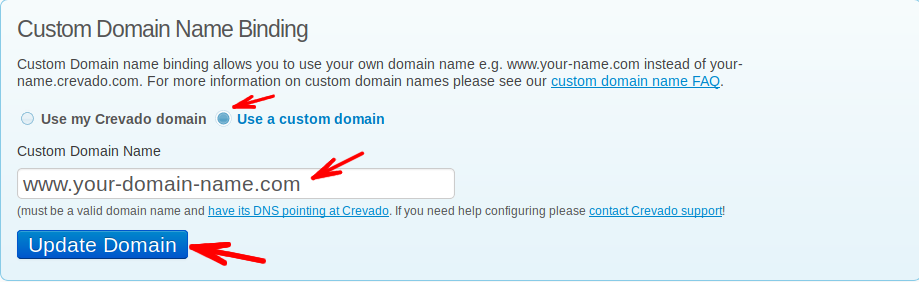
 Click on “use a custom domain” and add the WWW version of your domain name in the field provided and click the “update domain” button.
That’s it! Now all you need to do is wait for the DNS changes to take effect
Remember: The DNS changes you made at your registrar can take some time to propagate to DNS servers around the internet (anywhere from one hour to one day).