How Do I Password Protect My Entire Portfolio?

Password Protection is only available to Premium Account holders, for more details see the plan comparison page.

Password Protecting your Entire Portfolio:

By enabling this setting all pages on your portfolio will become password protected and visitors will be required to enter a password in order to view any page on your portfolio.

You can password protect your entire Portfolio from the Settings area of Crevado Admin. To do this you click on Settings on the top right of Crevado Admin:

From Settings scroll down to the blue header Misc Settings and below this you will see a box into which you can enter your password. Once you enter your password click save.

Note: If you Password Protect your entire Portfolio it will not appear in Google or other search engines. In addition, it is advisable not to use Portfolio wide Password Protection in conjunction with e.g. individual Gallery password protection as this will mean the viewer will require two passwords to access that Gallery.

How Do I Password Protect Individual Galleries?

Password Protection is only available to Premium Account holders, for more details see the plan comparison page.

Password Protecting Individual Galleries:

In some cases it may be desirable to have Public Online Portfolio but also have a way of restricting access to work within certain Galleries.

It is easy to Password Protect any Gallery. To do this simply click on Galleries on the top left of Crevado Admin:

Then click on the Gallery you wish to edit:

Scroll down to the Gallery Settings area and here you will see that Password Protection is the first option.

Click on the Password Protection blue area and a box will appear into which you can type your password:

Once you enter in your password click Save. Now all you have to do is provide whomever you wish to view this Gallery with the Password you have put in place.

Note: To remove Password Protection on a Gallery simply empty out the password field and press Save.

How to Edit Page Content on Your Crevado Portfolio Website

Editing Page Content:

You can Edit your Crevado Portfolio Website Page Content as often as you wish. Follow this step by step guide on how to do so.

Firstly, from Crevado Admin, click on Pages:

From your list of Pages, locate the page that you want to edit and click the related Edit Page Content link. Here we are going to edit our page entitled "Portfolio" - which is also our Homepage:

This will take you to your Portfolio in Live Edit Mode enabling you to edit the content of the page. A yellow popup at the top of the screen will alert you that you are in Live Edit Mode and reads: "LIVE EDIT mode is active. Click here to go back! or View Live Version". You will also see a toolbar at the foot of the page which you can use to make changes and don't forget to click Save when you are done:

Note: For more detailed information on the different components of the toolbar, please see our article Creating Custom Content Pages on Your Crevado Online Portfolio and scroll to the Controlling the Formatting and Layout of the Content on your Page section within that article.

From the Pages area you will also see your Galleries listed. You can also click on the Edit Page Content link for any of the Galleries. In the screenshot below we are using our "Architecture" Page for this example:

Editing a Gallery is a little different. When you click on the Edit Page Content link instead of going into "Live Edit Mode" you will go to the Gallery, where you can edit image details and change Gallery Information (e.g. Gallery Title, Gallery Description and Client Name). Below you will see the Gallery Description being edited:

You can also edit your Gallery Settings from here (e.g. enable/disable Image Downloads and privacy/password protection for those with the Premium Plan).

Note: For detailed information on Editing Image Details see our article How Do I Edit Image Details?.

Something not working? no worries - just contact us!

Adding 360 Degree or 'Equirectangular' Images to Your Online Portfolio

We are excited to announce support for 360 degree spherical images (also known as Equirectangular images) for your Crevado portfolio.

Equirectangular images are a great way to provide an immersive visualization experience to your Online Portfolio by providing viewers with a 360 degree panoramic views of your selected works. These types of images are especially popular amongst Architecture Portfolios as they allow for 3D walk-throughs of Architectural room renders etc.

Whether you're an Architect, Photographer or any other type of creative, adding 360 degree 'Equirectangular' images to your Online Portfolio has never been easier. Simply upload your images as normal, and assuming you've uploaded a Equirectangular image of high enough resolution you'll notice an additional option which will allow you to flag the image to be viewed as an Equirectangular image.

Note: For best results, high resolution images are recommended. Images should be 2000 pixels or greater in width.

Once you have uploaded your equirectangular image, tick the box next to the Display using Equirectangular Viewer option and then click on the blue Save button, as shown below:

A yellow pop-up at the top of the screen will confirm Changes saved successfully!.

The image will now display using our 360 panoramic viewer allowing visitors to pan and zoom 360 degrees around your image.

Live Demo of Equirectangular Viewer:

Use your mouse to pan and zoom around the image.

Something not working? no worries - just contact us!

What Video and Audio Formats Can I Use?

Remember: Audio support is available on all paid accounts and Video support is only available with a Premium Account. For details see the plan comparison page

Virtually all Video types are supported including native shockwave flash files.

WAV and MP3 audio files are supported.

Setting Your Homepage on Your Online Portfolio Website

Your homepage is the starting point of your Website. It's the first webpage that loads when someone visits your Crevado Portfolio Website so it's a page which may require some consideration/thought. You can choose what page you wish to have as your homepage, just follow these steps!

From Crevado Admin, click Pages:

From the list of pages displayed, you will be able to easily identify which page is currently set as your homepage - it will have a house icon next to it - as shown below:

Now to set a new homepage. Firstly, locate the page you wish to set as your homepage from the list displayed. For this example we are using our Food Photography page. Next, click on the properties (pencil) icon for the page you choose:

A popup entitled Page Properties will open. Now click on the box next to Set This Page As My Home Page and then click on Save Changes:

A yellow popup at the top of the screen will confirm Page Properties updated successfully - that's it - so easy right?

Something not working? no worries - just contact us!

Obtaining a Copy of Your Crevado Stored Data.

Our Data Download Tool makes it easy for you to download all of your data stored on our service about you.

To obtain your Data you first need to visit your Account page by clicking the Account link on the top right hand corner of Crevado Admin:

Once you are on the Account Page, scroll to the bottom of the page and click on the blue Data Download Page link:

Next, click on the blue Start My Archive button displayed:

Once done, you will receive a message informing you that your stored data is being gathered and you will be notified by email when the archive is ready for downloading:

Once you receive the Email, click on the link in the Email. This link will bring you to the Data Download Page which will now allow you to download your data by clicking on the blue Download Archive button:

That's it! You are done!

Something not working? no worries - just contact us!

Open Graph - What You Need to Know!

What is Open Graph?

Open Graph is a technology that allows integration between Social Media Websites (such as Facebook, LinkedIn, Pinterest etc.) and a users data.

What is a Meta Tag?

Meta tags are snippets of text that describe a page's content. Meta tags do not appear on the page itself, they are only in the page's source code. Meta tags are essentially little content descriptors that help tell search engines what a web page is about.

Using Open Graph and Meta Tags to Your Advantage:

By integrating Open Graph meta tags into your page's content, you can identify which elements of your page you want to show when someone share's your page. For example, you could use the og:image tag to specify what image you want to be used when your page is shared on a particular Social Media Website. So, by specifying the Open Graph information the Social Media Website doesn't have to guess what information to use when your page is shared.

The optimal resolution of an image used with Open Graph depends on the Social Media Website. With Facebook, the optimal resolution of an image used with Open Graph is 1200x630. However, some other Social Media Websites such as LinkedIn use square images. So, it is important to ensure that the image you use has white space padding around it, so it can be cropped to suit the Social Media Website that you are sharing it on. This will ensure that the image is displayed correctly.

Open Graph and Facebook?

When you use Facebook to share your Crevado Online Portfolio Website Link for the first time, it will remember the image associated with your Portfolio for at least 24 hours. So, if you want to use an Open Graph image you may need to debug Facebook - force it to forget the previously associated image for your Website and instead use the new Open Graph image that you have chosen.

Debugging your Facebook is easy! First visit this URL:

https://developers.facebook.com/tools/debug/

Next, enter your Crevado Portfolio URL into the space provided as shown below:

Then click the blue Debug button:

Once the page has loaded you then need to click on the Scrape again button:

This will reset the stored image data associated with your Crevado Portfolio and replace it with your newly chosen Open Graph image.

Explaining the Page Types Available on Your Crevado Online Portfolio

This page is a simple explanation of the available Page Types within the Crevado system. Firstly, a brief explanation of how to create/access these page types:

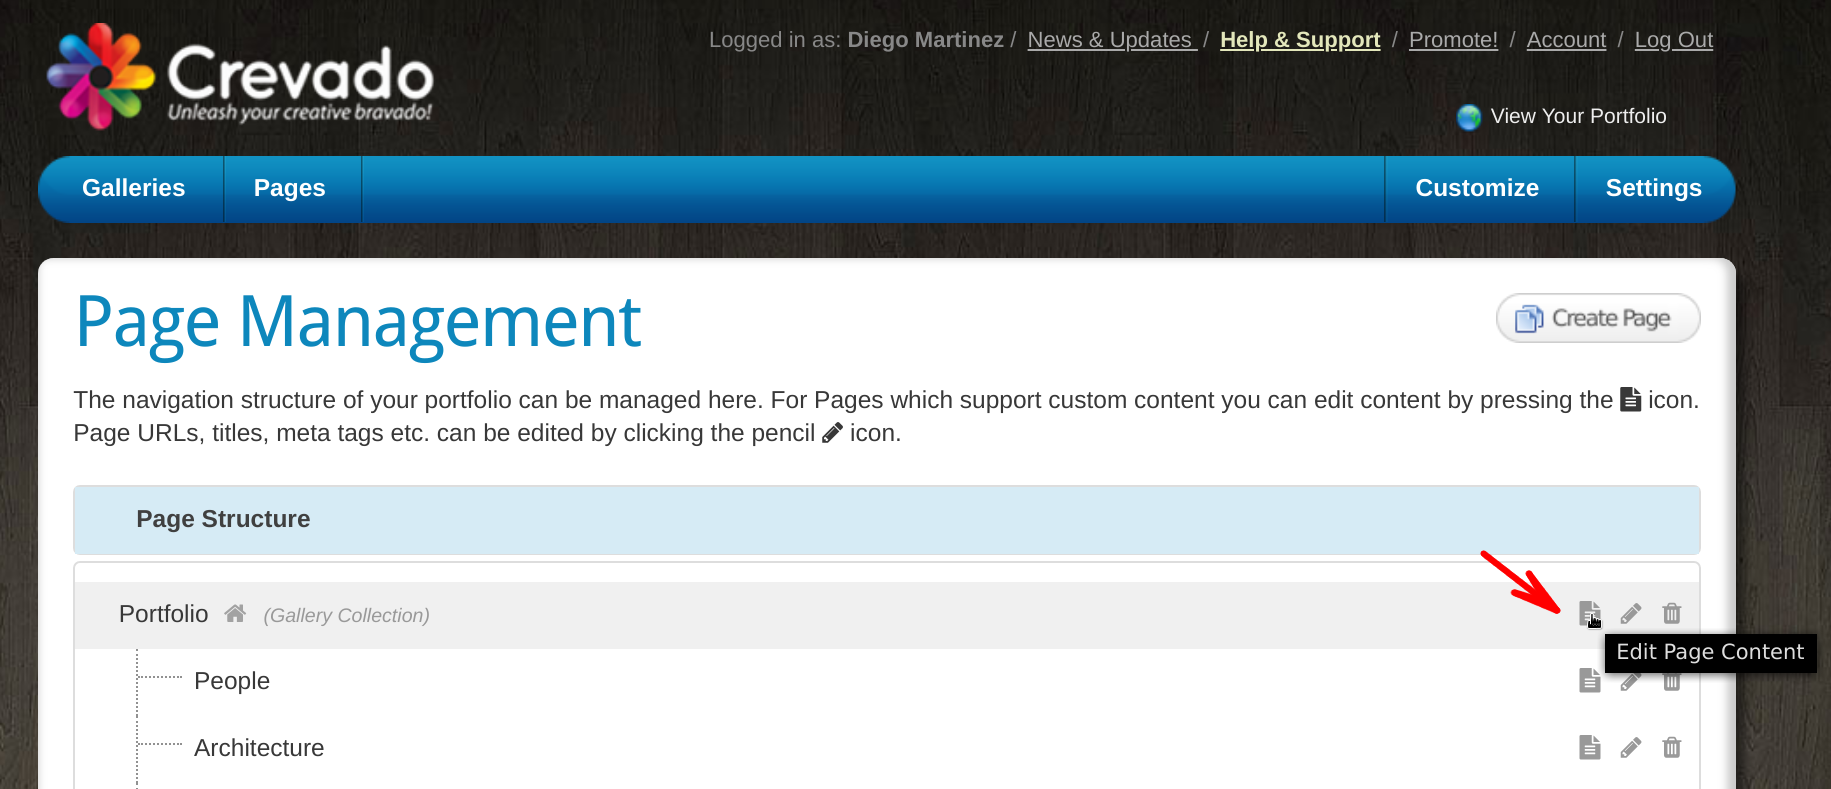
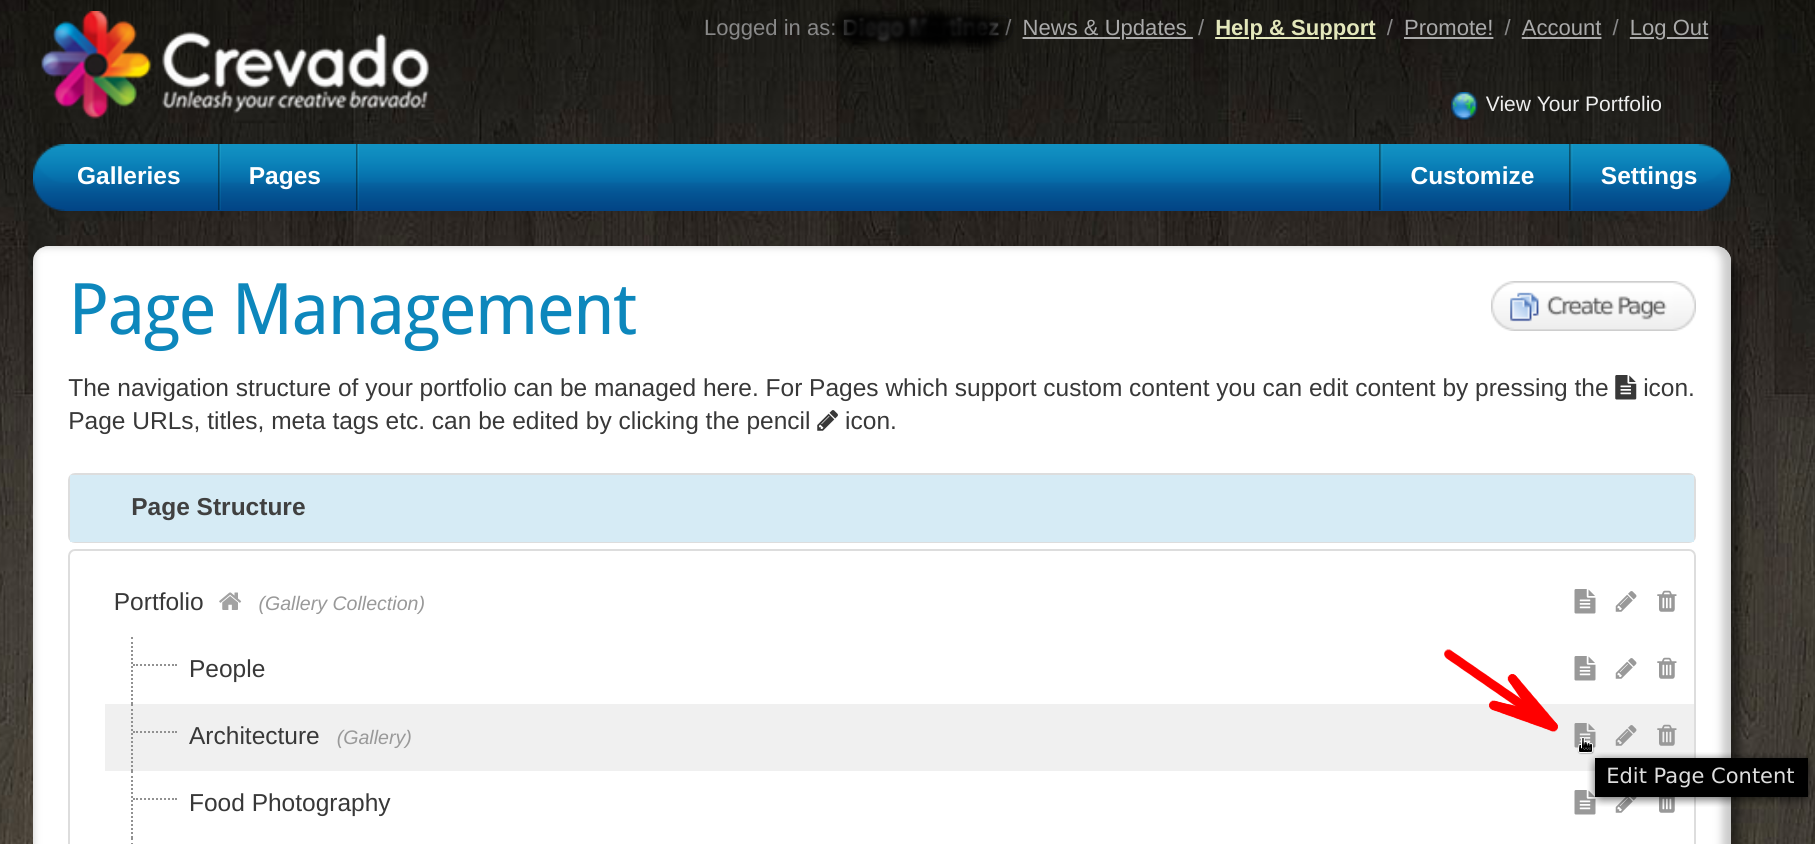
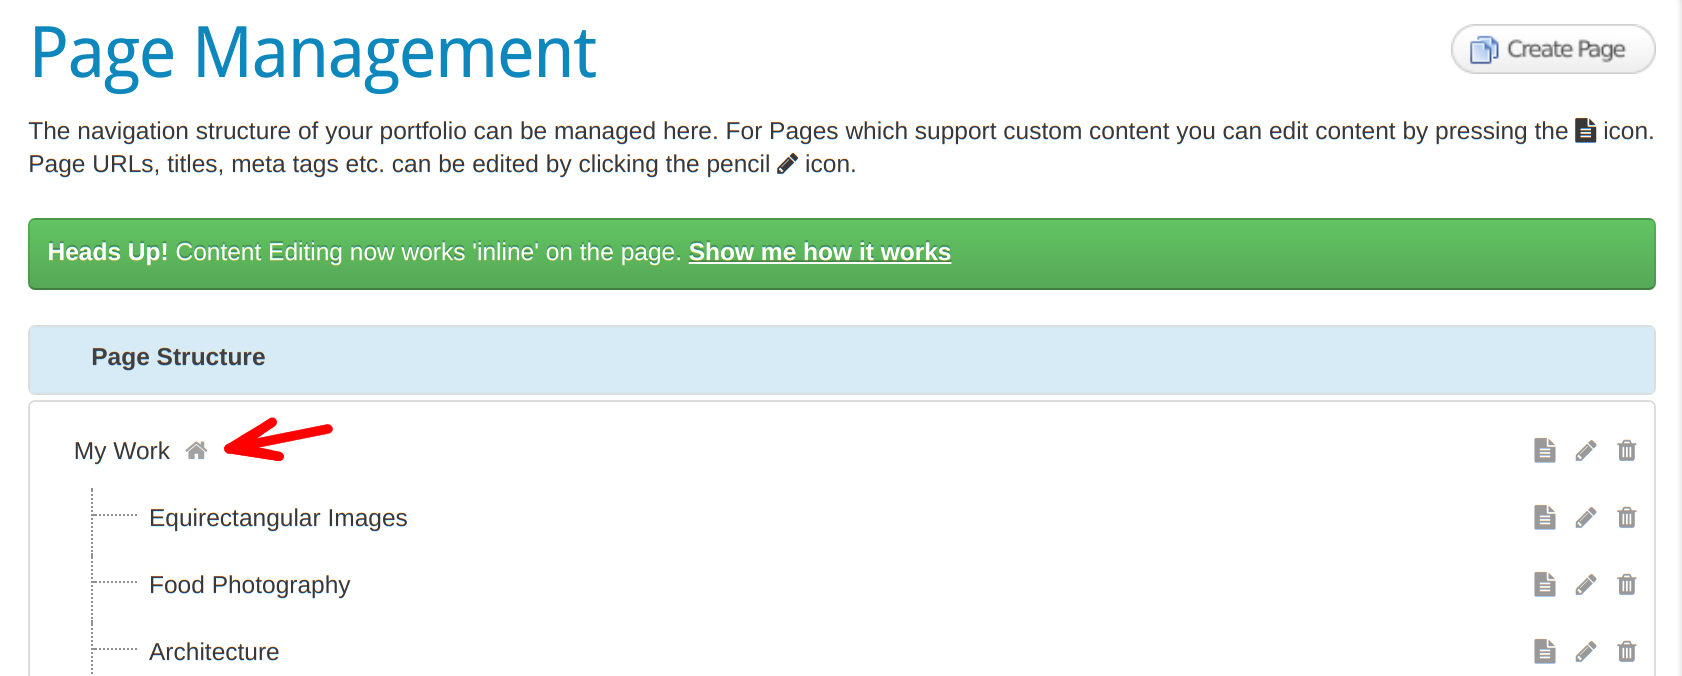
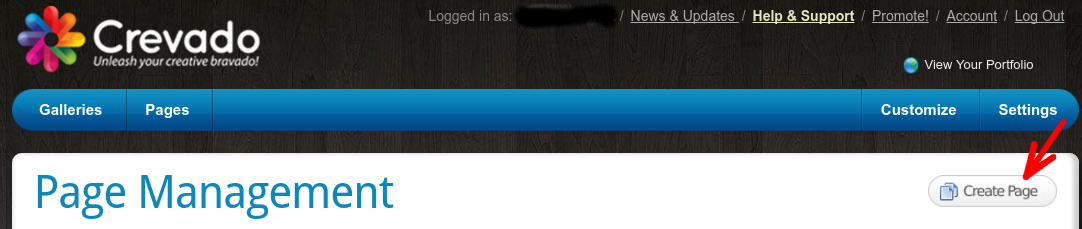
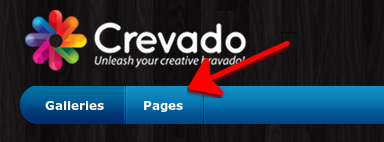
From Crevado Admin, click on the Pages button as shown below:

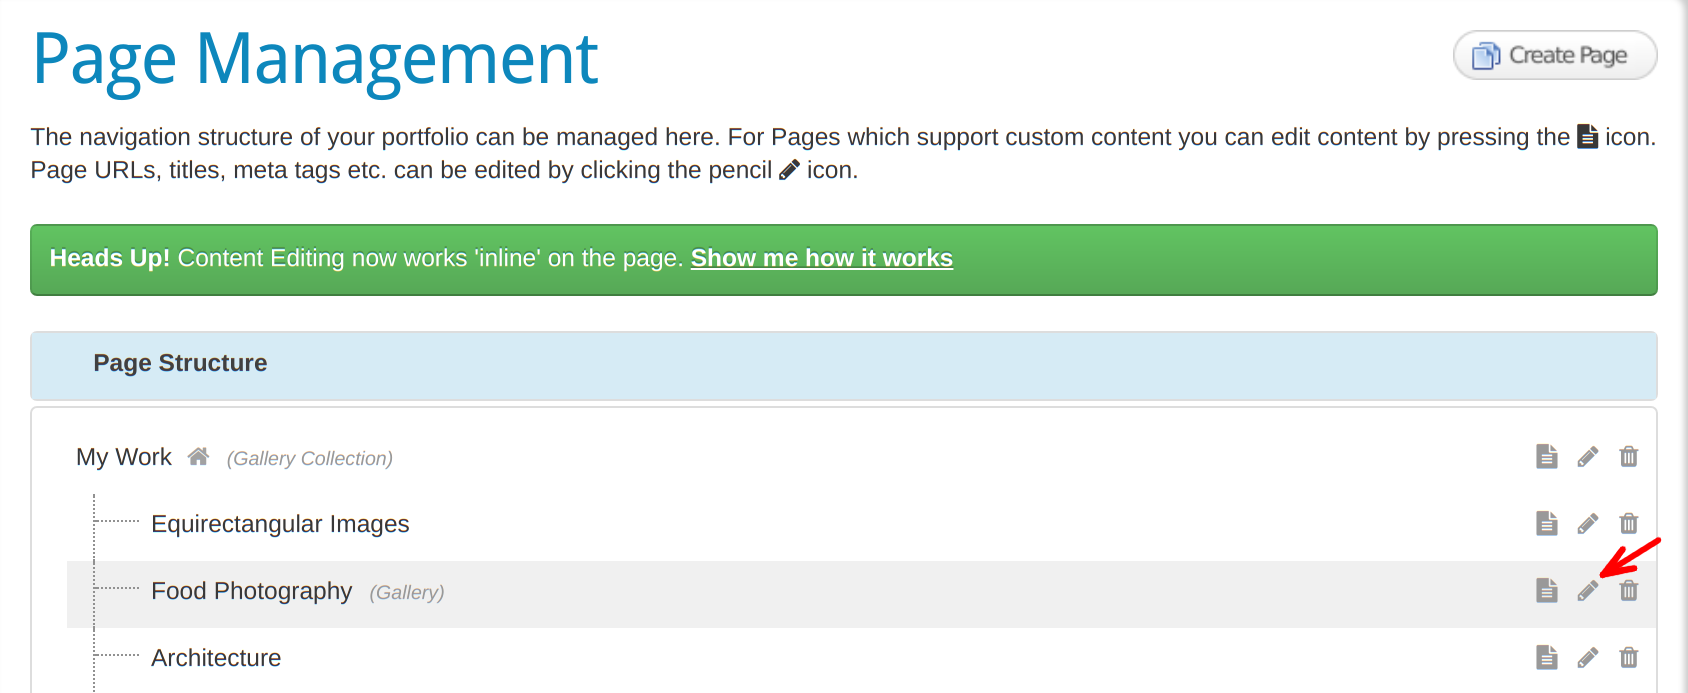
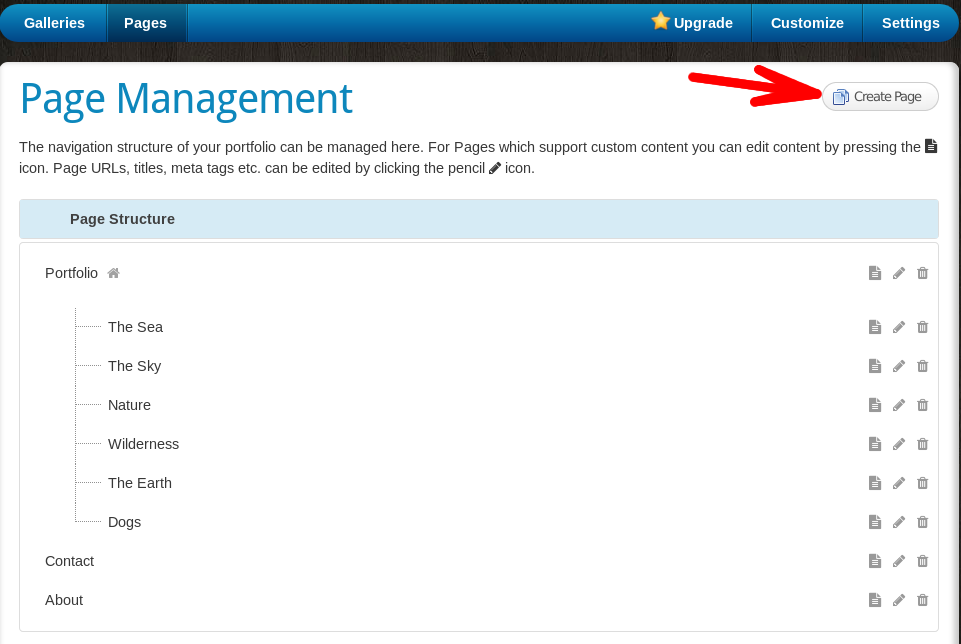
From Pages, locate and click on the Create Page button:

It is located to the right of the screen:

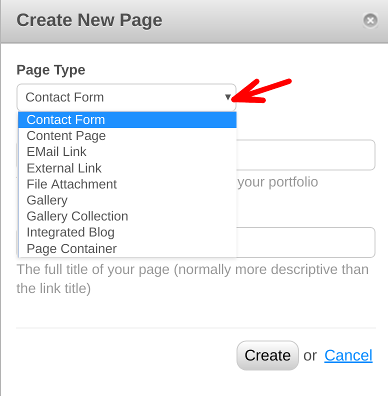
When you click on the Create Page button, a popup will open. This reveals the different page types available.

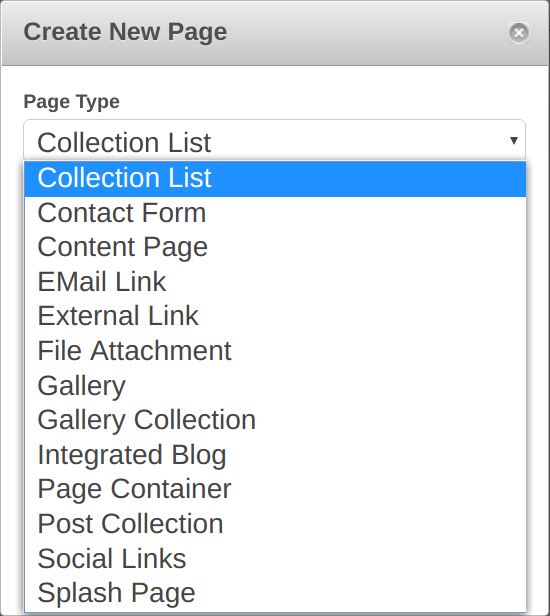
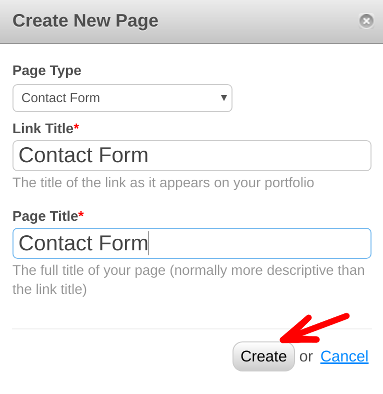
You can select the Page Type you desire from the drop down menu and then click the Create button to create the new page/link.

The new page/link will now appear in the navigation area of your Crevado Online Portfolio.

Page Types Explained

Collection List

A Collection List is used to display a list of Gallery Collections. So, if you have multiple Gallery Collections you may wish to have Collection List homepage where all of your Gallery Collections and the Galleries within them will be listed.

Contact Form

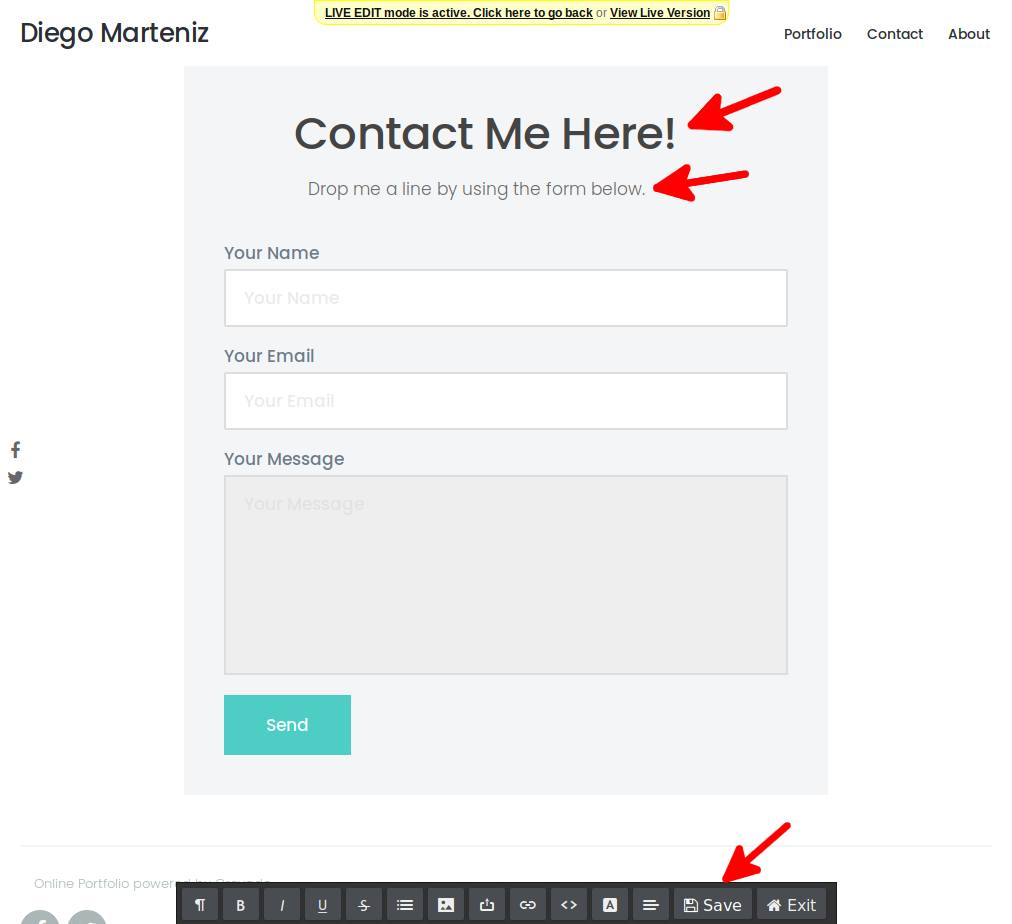
Provides an easy way for visitors to your Online Portfolio to contact you using a 'Contact Form' rather than a email link etc. It is the recommended way of allowing users to contact you since a contact form has several advantages over email links etc. See creating a contact form on your Crevado Online Portfolio Website for more information.

Content Page

Content pages are used as additional pages which contain your own custom content. For example, exhibition details, news & events, etc. For more information see creating custom content pages on your Online Portfolio Website.

It is a link that opens the users default email client to send an email to the address in the link i.e. a direct email from visitors of your Crevado Portfolio website to you.
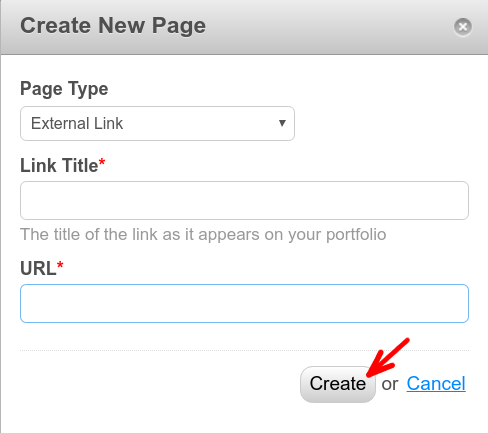
Adding an External link to your Crevado Online Portfolio creates a new link in your Portfolio navigation which in turn is linked to the website/URL of your choice. For more information please see creating external links on your Online Portfolio Website

File Attachment

Allows you to create top level links on your Portfolio's navigation which point directly to files (e.g. PDF or Word Doc). For more information please see how to attach PDF or MS Word Documents to your Crevado Portfolio

Gallery page types are specially designed for showcasing your work. For more information on creating Galleries please see how do I create a gallery?

A gallery collection can hold one or more galleries/projects. This page type can effectively be used to create groups of sub-galleries. For more information please see can I create Sub-Galleries within my Crevado Online Portfolio Website

Integrated Blog

This page type can be used to integrate a blog from a blogging service e.g. Blogger, or any Atom/RSS compatible blogging software. For more information please see integrating a Blog on your Crevado Online Portfolio

Page Container

A Page Container is merely a container for Pages. You cannot edit the content of a Page Container, you can only edit the content of the pages within it. The primary purpose of a Page Container is to allow you to have a top level navigation link which has content pages nested within it as submenu options. When you have created at least one Page Container, when creating a Content Page, you will be given an additional option to choose the "parent page" under where the Content Page will be created.

Post Collection

A Post Collection works like a Gallery Collection only instead of displaying Galleries it displays the Content Pages within the collection. When you have created at least one Post Collection, when creating a Content Page, you will be given an additional option to choose the "parent page" under where the Content Page will be created.

This page type can be used to place links to your Social Media presences within the main navigation on your Crevado Online Portfolio. For more information please see How do I Promote my Online Portfolio.

Splash Page

This page type acts as an introduction to your Portfolio. Splash pages can contain a slider which can be used to display your work and/or provide introductory links to Galleries on your Portfolio. For more information on Splash pages, and related configurable options please see Creating a Splash Page for Your Online Portfolio Website.

Something not working? no worries - just contact us!

Creating a Contact Form on Your Crevado Online Portfolio

A Contact Form is a great addition to your Crevado Online Portfolio Website. There are a number of advantages associated with having a Contact Form instead of a traditional Email link, here are a few:

  • A Contact form looks more professional compared to an Email link.
  • Contact Forms are user friendly; it's easier for the visitor to contact you without the need for them to open a separate Email program to do so.
  • Contact Forms provide a mechanism to contact you without revealing your email address thereby eliminating the possibility for spambots to harvest your Email address.

How Do I Add a Contact Form to My Crevado Online Portfolio Website?

NOTE: Contact Forms are only supported with our paid accounts!

Creating a Contact Form is easy! Just follow these simple steps:

From Crevado Admin, click Pages at the top left of the screen:

From the Pages section click the Create Page button:

The Create New Page pop-up will appear. When it does, you need to set the Page Type to the Contact Form option; click on the arrow to reveal the dropdown menu of options:

Next you need to fill in the Link Title and the Page Title and click on the Create button:

PRO TIP: The Link Title is used when linking to your Page within the navigation of your Portfolio. The Page Title can differ from the Link Title and is used primarily for the purposes of SEO. For more information on SEO and metatags please see customizing SEO and meta tags on your Online Portfolio

After you have created your new page, you will be taken to the Page Content Editor where you can edit your newly created Contact Form.

You can edit the Title and Description that will appear at the top of your Contact Form, just click to insert the mouse pointer where you want to type/edit. As you can see, the Content Editor toolbar is at the bottom of the screen (as shown below). Don't forget to click the Save button on the toolbar when you are done editing:

When you're done, you can visit the live version of your Contact Form page by clicking on the View Live Version link at the top of the page to see the final result. We recommend testing the contact form to ensure you're receiving Emails from the mailer system.

Something not working? No worries - just contact us!